Thursday, December 22, 2011

Almond Biscotti

Biscotti was in my 'to bake' list for a long time and finally I made it yesterday for my kid's teachers. Biscotti's are traditional Italian cookie which are long curve shaped, baked with only eggs and sugar as the main ingredients. No fat is added to these cookies. It has a crisp and crunchy texture, great with a cup of tea and it stores well for several days.


Ingredients:
1 cup blanched whole almonds
3 eggs
3/4 cup sugar
2 cups all purpose flour
1 tsp baking powder
1/8th tsp salt
1/2 tsp vanilla essence
1 tsp almond essence


Method:
Blanching the almonds:
Boil the water in a sauce pan and add the whole almonds. Leave them in the boiling water for exactly 1 min.
Then drain the water and remove the skin. The nut just easily pops out of the skin.
Cool the nuts


Toasting the almonds
Heat the oven to 350F
Spread the cooled almonds on a baking sheet
Bake for 10 mins or until the nuts are slightly brown and fragrant


Baking of the Biscotti is done in two parts.


Baking the Biscotti - Part 1
Preheat the oven to 300F.Line the baking sheet with parchment paper or wax paper
Stir the flour and salt in a bowl.
Roughly chop the toasted almonds
Beat the eggs and sugar till pale and creamy. If you lift the beater the mixture should fall into ribbons
Now add the vanilla and almond essence, and beat for 2 mins .
Now add the dry ingredients slowly and beat till incorporated.
The dough is very sticky at this point.
Dust the working surface and your palms with flour.
Transfer the dough to the floured surface and shape it to a log of about 12 inch in length and 3 - 4 inch in width.
Transfer the log to the prepared baking sheet. Bake for about 30-40 mins or until firm to touch.
Cool on a wire rack for 15 mins


Part 2:
Cut the log into thin slices of about 1/2 inch thickness.  Arrange the slices , cut side down on baking sheet and bake for 10 mins. Turn the slices over and bake for another 10 mins or until brown and crispy.
Remove from oven and let cool. Store in airtight container.
This measure yields about 15-16 slices, depends on how thin you slice it.


Wish you all Happy Holidays :)

Friday, December 16, 2011

Sugar Cookies

Baked my first batch of cookies for the season. It all started when my son came home from school whinning about how they made cookies at school and how he wanted to do the same at home. It was funny to watch him explaining the whole act of making the cookies as if trying to teach me how to do it. He was like "Don't make round balls amma, roll out like chapati and I will cut into shapes". Nowadays kids are very clear about what they want and how they want it.


Ingredients:
1 and 1/2 cup cup all purpose flour
1/4 tsp salt
1/2 tsp baking soda
1/2 cup unsalted butter , room temperature
1/2 cup sugar
1 large egg
1 tsp vanilla extract


Method:
Sift the flour, salt and baking soda in a bowl
Beat the butter and sugar till light and fluffy (2 -3 mins)
Add the egg abd beat for another 2 mins until pale and creamy
Now add the Vanilla extract and beat for another minute.
Add the flour mixture and beat till combined.
Take out the dough and shape it to a disc, cover with plastic wrap and refrigerate for an hour.
Roll out the dough and cut into shapes. 
Place the cut out dough on tray covered with wax paper or parchment paper.
Sprinkle some coloured sugar or sprinklers or plain white sugar. (optional)
Bake for  8 - 10 mins. The edges should be slightly brown.
Cool on a wire rack. This measurement yields about 18-20 medium sized cookies


These cookies turned out not as sugary as I thought it would be.It was buttery and mildly sweet.
Note:
Always keep the unused dough covered with plastic wrap.
You can also freeze the remaining dough and used it later


My first attempt in decorating  Sugar Cookies.
I attempted to decorate some of the cookies after being inspired by this post from Aparna
I used the same recipe she gave there  for icing. The icing was little bit thin .
for me so I added a tsp of corn starch and some more sugar to thicken it up. At first it was very difficult to get hold of the process, after a few cookies or rather mishaps, some of them came out better.
It takes a lot of patience and time to decorate the cookies, may be it will ease up  with practice. My son likes it, so that's all it takes for me to try it again :)


Ingredients:
1/2 cup icing sugar
2 tsp corn starch
1 tsp lemon juice
2 tsp milk/water
a drop of required colour.


Mix everything well except the colour. Increase the water /milk by a tsp at a time if want to thin the Icing.
Increase the sugar and cornstarch by 1/2 tsp each to thicken the icing.
Seperate into small bowls and add the required colour. I used cocoa powder to get the brown colour.
I used little ziplog bags for the piping.Make sure to cut a tiny hole to get a smooth line.


Have a nice weekend :)


Sending these cookies to the 'Sinful delights ' events at "Zesty Pallete" 

Thursday, December 08, 2011

Aval Payasam / Rice Flakes Kheer


Today is Karthigai Deepam - The festival of lights and I did my best for my son to feel what it actually means through food and some candle lights. Though it's not even 10% close to what we celebrate in TamilNadu, it was nice and subtle in our own way. For those of you who wants to know more about what is 'Karthigai Deepam' and the legend behind the festival head over to Cham's place  and check out her detailed post about this wonderful day of lights.

Now coming back to food,  I prepared Aval Payasam and Ulunthu/Urad dhal  vadai .


The recipe for the Urad dhal is the same as I mentioned in this post. But today I followed an interesting tip given by my aunt.To make the vadai's more crispy on the outside soak 2 tblsps of Thoor dhal  along with the urad dhal and the rest of the procedure is the same as given here


Aval Payasam:

This is a fairly simple recipe just like any other payasam, it takes hardly 30 mins to prepare. I used Cashews and Almonds, you can also use any other nuts of your choice. An additional 1/4 cup of shredded coconut also brings out an extra richness to this payasam,but its purely optional and I didnt use it for today.

Ingredients:
1 cup Rice flakes/Poha
6 cups milk
1 cup sugar
handful of cashews( about 1/4 cup)
handful of Almonds (1/4 cup)
2 elaichi/cardamom / 1/4 tsp of cardomom powder
2 tblsp of ghee

Method:
Boil the milk in saucepan
Paralley roast the riceflakes in about 1/2 tsp of ghee until you get a nice aroma
Add this roasted riceflakes, sugar and elaichi  to the boiling milk 
Cook in medium flame with constant stirring until the rice flakes are cooked and soft to the touch.
 It takes about 15 - 20 mins. 
In a seperate pan roast the cashews and almond to golden brown in about a tblsp of ghee.
Add this to the reduced payasam and switch off the stove.
The payasam/gheer will thicken as it cools down.
Serves about 5-6 people.


Have a nice weekend ! 

Tuesday, December 06, 2011

Spinach Masala Vadai

A crispy snack for the upcoming cold evenings and also a great way to use up the left over spinach:)

Ingredients :
1 cup Channa dhal
1/4 cup Thoor dhal
1/4 cup Urad dhal
2 cloves garlic (optional)
1 inch piece Ginger
1tblsp Fennel seeds
5-6 red chillies
Handful of currry leaves chopped finely
2 cups Spinach, chopped finely
1 cup of onion chopped finely
3 green chillies finely chopped

Method:
Soak all the dhals together for about 2 hours. 
Grind them coarsely without adding water along with the fennel and red chillies.Sprinkle some water if needed.
Take the mixture in a wide bowl.Add chopped ginger, garlic onions,green chillies, curry leaves ,spinach and required amont of salt.
Mix well and make small balls out of the dough.
Heat up the oil in a deep pot, flatten the ball and slide it to the oil. 
Fry till crispy and golden brown.
You can fry 4-5 vadai at a time.


Note:
The onion must be chopped finely for the vadais to be intact, otherwise it will break up in the oil.
Take care while adding salt as spinach already has some natural saltness 
Do not use frozen spinach for this recipe.
If the dough is loose add couple of tsp's of besan flour to thicken it.


Wednesday, November 30, 2011

Radish/Mulangi Curry With Prawns

I don't make prawns at home often but when I cook them its always in combination with some vegetable.
I bet most of you might not have heard about this dish, but it is a favourite in the areas around Cuddalore and Pondicherry in TamilNadu. Whenever Prawn is in the menu for the sunday lunch, my mom always keeps aside a handful of them in the freezer to make this delicious thokku/curry the next day. 
Other vegetables that can be used in combination with Prawns are Ridgeguard, Bottleguard, Drumsticks and  Raw Plantain.


Ingredients:
1 medium white daikon raddish 
8 - 10 large Prawns, cleaned (if small use about 1/2 cup)
1 large onion
6 cloves of garlic
1 tsp of fennel seeds
1 1/2 tsp chilli powder
1/2 tsp turmeric
curry leaves
salt as required

Method:
Take 1 tblsp of oil in a pan
Add the fennel seeds and curry leaves when the oil is hot
When the fennel changes colour add the chopped garlic and onions, fry well till translucent
Now add the cleaned Prawns, chilli powder, turmeric powder and salt
Saute till the prawns turns pink for about 2 mins. 
Now add the chopped up radish and mix well to coat the masala.
Add about 1/2 cup of water , close with a lid and let it cook for about 10 mins.
Add some chopped coriander and switch of the stove. 
The consistency of the curry should be semi dry
Serve with plain hot rice.


Friday, November 18, 2011

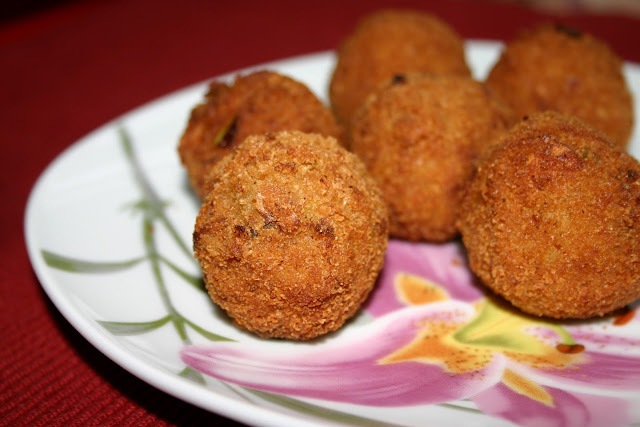
Potato Mushroom Croquettes

This post is after a very long break, say about 6 months. Well,  this past 6 months has kept us very busy with moving from one place to another. First we packed our things and  moved back to Chennai from Brussels and then after  couple of months moved to a new house in Chennai. When we were just getting settled comfortably in our new home my husband got an offer at work to move to United States. So here we are now, back in the US trying to adjust to the weather from very hot to cold. But I must say that the weather is pretty nice and warm for the past few weeks in the New England area except for the surprise early snowfall in the mid-October.
While my son is slowly getting settled with his school routine, I thought its high time I write a post in the blog before life gets busy again..you never know :)
When I was clearing out some not so good pictures from my blogged and non-blogged folders (Thanks to Cham for that neat idea, it really helps a lot), I came across this picture of the potato and mushroom croquettes that I made way back on one cold evening in Brussels.
Here goes the recipe...


Potato and Mushroom Croquettes
Ingredients:
2 large potatoes
1 medium onion , finely chopped
2 cloves garlic, finely chopped
1 inch piece of ginger, finely chopped
1 green chilli finely chopped
2 cups of finely chopped mushrooms.
1/2 tsp chilli powder
1/2 tsp chat masala powder
1/2 tsp jeera powder
1 tsp lemon juice
3 tblsp finely chopped coriander leaves
oil and salt as required
2 cups of bread crumbs for rolling


Method
Boil the Mash the potatoes
Wash the mushrooms in running water and wipe with a clean kitchen towel.
Finely chop the mushrooms, onion, garlic, ginger, and green chilles.
Add 2 tblsp of oil in a pan. Add the chopped onions, garlic, ginger and chilies, stir well till the onions are translucent. Now add the chopped mushrooms and saute on medium flame.
To this add chilli powder, cumin powder, chat masala powder, and the salt.
Stir well to combine for about 2 mins. Just when the mushrooms are wilted, add the mashed potatoes, coriander, lemon juice and stir well to combine.
Switch of the stove and allow it to cool completely.


Make small balls or roll it into logs .Take the bread crumbs in a plate.
Heat the oil in a deep pan. Roll the balls in the bread crumbs and fry them 4 at a time in the medium heat oil .
Slightly turn the balls using a slotted spoon for even browning on all sides.
Enjoy with a cup of tea :)


Notes: 
  • Do not immerse the mushrooms in a pot of water for washing as it will soak up the water and release it while cooking.Always wash with minimum running water from the tap, or wipe with a damp kitchen towel
  • If the potato mixture is mushy add about a 1/4 cup of bread crumbs to the mixture. Keeping it in the fridge  for 30 mins also helps tighten the potato mixture.
  • If you are out of Chat masala, add about 1/4 tsp of garam masala and 1/2 tsp of amchoor powder.

Tuesday, May 10, 2011

A ride through the country side

Village of Torgny, one of the most beautiful village of Belgium. Placed on the French side of the country, each  house was unique in its own way. It was a delight to see the cute French houses, the vineyards and the yellow meadows at this time of the year.


Sunday, May 08, 2011

A Peek into the Local Bakery in Dinant


Happen to come across this bakery when we were roaming around in Dinant.Their speciality is biscuits using large moulds 
Take a look :)


Thursday, April 28, 2011

Kids food - Sweet Potato Muffins

Most of us do not use sweet potato as much as we use potatoes. This wonderful root is a rich source of several vitamins, antioxidants as well as fibre. In one of the recent articles that I read , was quite surprised to see that this humble vegetable being one of the seven food that kids should have on a regular basis, among the other foods like yogurt, salmon(or any other food rich in omega 3 fatty acid) , spinach, walnuts and almonds, berries and avacado.
While making oven roasted fries is an option, baking muffins with them is another easiest way to include this vegetable in the kids diet.


Here is a simple and easy recipe to impress the kids with sweet potato.


Ingredients:
1 cup Whole wheat flour
1 cup All purpose flour/Maida
11/2 tsp baking powder
11/2 tsp cinnamon
1/4 tsp salt
1/3 cup brown sugar or regular granulated sugar
3/4 cup sweet potato , cooked and mashed
3/4 cup milk
1/4 cup oil
1 egg


Method:
Preheat oven to 350F / 180 C
Cook the sweet potatoes till soft , peel and mash them
Beat the egg seperatly in a small bowl
Combine all the dry ingredients - flour, baking powder, salt, cinnamon and sugar in a large bowl .Mix well using a whisk
Add the milk, oil and egg to the dry ingredients and mix gently.
Stir in the sweet potatoes, combine until smooth


Fill in the muffin cups  and bake for 18 - 20 mins


Sending these healthy muffins to the "Show me your muffins " event by Divya at Dil-se


Saturday, April 23, 2011

Spring At its Most Beautiful ! - The Blue Bells of Halle

Blue Bells in full bloom at the Halle forest (HallBros) Belgium. We spent a good 4 hours of trekking through the forest. It was a magical experience to see the forest covered in a blue carpet. A visual treat to the eyes.
Missed my SLR though :(  (Well  I lost it during my trip in Barcelona). Have to live with the Sony cybershot for some time :)
Here are some pictures for you all to enjoy :) Have a nice weekend.


Tuesday, April 19, 2011

Kadalaimaavu Paniyaram / Besan Kasuri Methi Paniyaram

Here's a quick and easy snack that can be made in about 20 mins. Since the non-stick paniyaram kal is used very little amount of oil goes into this, making it a healthy low fat snack. 


Ingredients:
1 cup Kadalai maavu /Besan
1/4 cup Rice flour
1/2 tsp Baking powder
1/4 tsp Baking soda (optional)
1/2 tsp salt
1 tsp Chilli powder/ chopped green chilllies
1 tblsp Kasuri Methi
1 cup thinly sliced Onions
1/2 tsp  hing/Asoefotida
11/2 cup water


Method:
Mix all the dry ingredients in a bowl and mix well using a whisk for about 2 mins.
Then add the onions and mix well with about a cup  and half of water. 
The consistency should be slightly thicker than Idly batter. 
Allow the batter to rest for atleast 10 mins
Heat up the paniyaram pan or the appe pan  add 1/4 tsp of oil in each mould.
Add a tblsp full of the batter in each of the mould and cook covered for a minute in medium heat.
Remove the lid and flip the paniyarams gently to the other side.
Cook till golden brown.
Serve with any chutney or sauce.


Notes:
Resting the batter for atleast 10 mins results in soft and fluffy paniyarams.
You can increase or decrease the spice level as per your taste.
Baking soda is absolutely optional, the result is good even without using it.
If you don't have a paniyaram kal, use the same ingredients(except the baking powder) to make soft pakoda's deep fried in oil, comes out really good.

Friday, April 08, 2011

Bakes from other blogs - Posts from the archives

Today I was sincerely organizing and clearing up my folders with pictures, it turned turned out to be a humongous task..really. 
How do u all  keep track of your 'blogged' and 'to be blogged' posts and pictures. Any tips on that would be greatly appreciated.
Anyways I came across some delicious cakes that I baked when my kid was a year old. Can you believe, it was about two years back. Better late than never - is what I say to myself :). The recipes were from Sunita's world. Her blog inspired me to venture out into the world of baking, until then it was just banana bread for me :)


Lemon Coconut Cake


Absolutely delicious cake. I followed the recipe with minor changes such as only 4 eggs and no cashew nuts.


Banana Chocolate Almond Cake


Have a Great Weekend :)

Monday, April 04, 2011

Semiya Kichadi - In the memory of my Brother

I made and pictured this dish long back but never get to post it, as I thought that the picture was not so good. But today somehow I felt like blogging about this dish as this was my Brother's favorite breakfast item. As a matter of fact he would have this any time of the day. He had asked me couple of times about why I have not blogged this recipe for which I answered that 'there's nobody out there who would be interested in this one other than you'....
Much to the irony, he left home having Semiya Kichadi (Amma made this on his request) as breakfast on the day fate took him away from us.
I did'nt even name the picture properly while storing, so had to spent almost an hour digging through all the folder in my archives and was so happy to have found it atlast.
So here goes the recipe...in the memory of my dear brother....


Ingredients:

1 cup Semiya/Vermicelli
1 large onion
4 pods of garlic
1inch ginger
2 green chillies
handful of mint (optional)
1 cup mixed vegetables (carrots, peas, beans, potatoes)
oil and salt to taste.

Method.
Dice the vegetables to small cubes
Crush the garlic and ginger.
Slit the green chillies and thinly slice the onions
Roast the semiya/vermicelli in about a tblsp of oil under medium flame, till slightly brown.Keep aside
In the same pan add 2 tblsp of oil. Add the crushed garlic and ginger, sliced onions, green chillies,mint  and curry leaves. Saute till the onions wilt and turn translucent.
Add the chopped veggies and salt. Stir well for about 3 mins.
Now add 1 1/2 (one and half) cup of water and close with a lid.
When the water starts to boil add the roasted vermicelli and cook till all the water is absorbed.


Tuesday, March 08, 2011

Taking a break...

Many of you might have noticed that that this space has been silent for a while now.
It will be so for some more time, not sure for how long, until I get back myself from the things that happened around my family for the past one month. I just returned back from Chennai, after attending to the terrible tragedy that struck my family like an axe, which took away my brother from us. Yes, I lost my younger brother and a cousin sister  to a terrible accident on Feb 2nd.  I am still trying to come out from this incident, but finding it very hard to do. 
I feel that time is the only solution for this. Until then have decided to take a break from blogging, but I will visit all your blogs regularly  and also planning to work on some blog related  technical stuff to keep myself occupied and busy. 

Monday, January 31, 2011

Pictures from Barcelona

We spent our 10th Anniversary last week  in Barcelona, Spain. Here are some pictures.

 Automatic (unmanned) tram going up hill towards Mt.Tibidabo


A Sacred Catholic Church on top of Mt.Tibidabo.


A Palace converted to a Present day Museum.


Olympic Stadium and Monument.


Antonia Gaudi's  "Guell Park"


La Sagrada Familia - Gaudi's Architectural Masterpiece.. Gaudi died in 1926 before completing the structure,  but the work is still in progress


La Pedrara - Another Master piece of Gaudi..


Have a great week. Cheers :)
Related Posts with Thumbnails