Showing posts with label snacks. Show all posts

Sunday, April 01, 2012

English Muffin Pizza

This recipe immediately caught my attention when I came across this in the food network channel a few weeks ago. I prefer to have english muffins over bread for breakfast everyday whereas its the reverse with the rest of the family, but making pizza with these bread seemed to be a great idea for a weekend dinner. So without any second thought I grabbed a pack of my favorite brand of english muffins during my grocery shopping and am so glad I did that. 
I experimented with a variety of veggies for the toppings right from eggplant to zucchini and each mini pizza's turned out absolutely delicious.


Ingredients:
6 English muffins
2 cups Pizza/ pasta sauce
3 cups shredded mozzarella cheese
Your choice of sliced vegetables.
(I used Onions, tomatoes, peppers, eggplant, zucchini, olives)
Method.
Preheat the oven to 425F
Split open the Muffin using a fork. Do not use a knife.
Place the muffins on a baking tray.
Spread about 2 tablespoon of sauce over the base. 
Spread some mozerrella cheese, and the add your toppings.


Bake for 10- 12 minutes or until the cheese melts and spread evenly.


Note: 
If using eggplant, add 1/4 tsp of salt and some lemon juice to the slices and allow it to rest for atleast 10 mins. Squeeze and drain the water before adding to the pizza.


Enjoy!

Tuesday, March 13, 2012

Chunky Guacomole With Baked Pita Chips

I used to hate Guacomole when I first tasted it in a mexican restaurant and stayed away from avacado for quite some time. But then a few years back I was introduced to this chunky version of the dip by a dear friend S (back in Belgium) in her son's birthday party. After numerous assurances from her I gave this a try and absolutely fell in love with the dip and also with the wonder fruit - avacado ever since.
Thanks to S ,nowadays I make it atleast once a week  for snack as my son loves this 'green' dip (as named by him) a lot. The tastes of the Guacomale is at its best when the Avacado is ripe, moist and in season. Never use the blackened or over ripe ones as it tends to spoil the taste.

Serve with some baked pita bread for healthy version or with some store bought tortilla chips for quite an indulgence :)


Ingredients:
1 ripe and firm Avacado
1/4 cup chopped onion
1/4 cup chopped tomatoes(without pulp)
1/4 cup chopped cilantro
1 small green chilli finely chopped.
salt ,coarse black pepper and fresh lemon juice to taste

Method
Cut and scoop the pulp of the avacado int a bowl.
Cut the tomato into half, and sqeeze the pulp out of it, discard the pulp and add the chopped tomato to the bowl.
Now add the onions, chilli, salt, coarse black pepper and chopped cilantro
Give it a mix with a fork, gently breaking down the avacado pieces..

To make the pita chips.
Cut open the pita bread into two discs. (I used it whole here)
Cut into triangles and bake in 400F preheated oven for about 10 -15 mins, or until it becomes crisp.


Notes:
If you like the smoother version, mash the avacado well with a fork to a smooth texture and then add all the other ingredients.
Always use freshly ground coarse black pepper as it gives much better flavour to the dish.


Thursday, February 23, 2012

Simple Garlic Bread - My Way

Whenever I make soup of any kind, I tend to make garlic bread. Usually I add the butter - garlic mixture to the sliced bread and broil in the oven for about 5-6 minutes. But for the past few years I have been making it in a different way and love the bread made this way to bits and pieces. It makes the bread soaked up with the garlic flavor, without making them too crusty. I came across this method of baking garlic bread when browsing through one of the cookbooks from the library. I don't remember the name of the book but this tip got struck in my head forever :) 


Ingredients:
1 medium french baquette (I used a multi grain bread)
8 cloves of garlic chopped finely
2 tblsp butter
3 tblsp olive oil.
1 tsp dried oregano
salt and pepper as per taste


Method.

Preheat the oven 350F

Chop the garlic finely.I used a garlic press from Ikea, such a nice kitchen accessory.

Mix  it up with butter, olive oil, oregano salt and pepper.Let it sit for 15 minutes.


Slice the bagutte in to thin slices 3/4 the way (not into separate pieces).

Fill up the slits with garlic mixture.  Brush the remaining mixture on top of the bread.


Wrap it up tightly with aluminium foil

Bake in the 325F  oven for 20 minutes.


Note :  You can also decrease the amount of butter and increase the olive oil, that works great too.
Home made garlic bread  is always the best as you can control the amount of salt as well as butter as per our need.
For more crispier slices grill it in the broiler for a minute or two.


Monday, February 20, 2012

Banana Peppers/ Milagai Bhajji

Bhaji is a classic South Indian snack that is totally irresistible. My Mom makes this whenever we have guests and she makes it so perfect without any grease, even if you press it down with a news paper (oh , thats what we do to take the grease out of the bhaji...no power towels :)). Over the period of time I have learned that its the consistency of the batter that matters. It needs to be thick enough to coat the vegetable you are using, something like the idly batter. My all time favorite bhaji is with plantains(raw banana)..nothing can beat that, but today its gonna be  with banana peppers which is my hubby's favorite.


Ingredients:
Banana peppers 4 
1 cup Besan flour/Kadalai maavu
1/4 cup Rice flour
1/4 tsp hing powder/asoefotida
1 tsp red chilli powder
salt as required
2 tblsp Idli /dosa batter  (or) 1/4 tsp sodium bicarbonate.


Method:
Cut the banana peppers into thin long strips. Remove the seeds.
Heat the oil in deep sauce pan.
Make a thick batter by adding 1 and 1/2 cup water and all the powders together. 
Whisk it well to form a smooth batter.
Dip the peppers in the batter and fry in the oil till golden brown.
Serve it with Coconut chutney or with your favorite dipping sauce.


Note: If the batter is thin or watery, it absorbs more oil, so add more besan flour to make it thick.

Thursday, December 08, 2011

Aval Payasam / Rice Flakes Kheer


Today is Karthigai Deepam - The festival of lights and I did my best for my son to feel what it actually means through food and some candle lights. Though it's not even 10% close to what we celebrate in TamilNadu, it was nice and subtle in our own way. For those of you who wants to know more about what is 'Karthigai Deepam' and the legend behind the festival head over to Cham's place  and check out her detailed post about this wonderful day of lights.

Now coming back to food,  I prepared Aval Payasam and Ulunthu/Urad dhal  vadai .


The recipe for the Urad dhal is the same as I mentioned in this post. But today I followed an interesting tip given by my aunt.To make the vadai's more crispy on the outside soak 2 tblsps of Thoor dhal  along with the urad dhal and the rest of the procedure is the same as given here. 


Aval Payasam:

This is a fairly simple recipe just like any other payasam, it takes hardly 30 mins to prepare. I used Cashews and Almonds, you can also use any other nuts of your choice. An additional 1/4 cup of shredded coconut also brings out an extra richness to this payasam,but its purely optional and I didnt use it for today.

Ingredients:
1 cup Rice flakes/Poha
6 cups milk
1 cup sugar
handful of cashews( about 1/4 cup)
handful of Almonds (1/4 cup)
2 elaichi/cardamom / 1/4 tsp of cardomom powder
2 tblsp of ghee

Method:
Boil the milk in saucepan
Paralley roast the riceflakes in about 1/2 tsp of ghee until you get a nice aroma
Add this roasted riceflakes, sugar and elaichi  to the boiling milk 
Cook in medium flame with constant stirring until the rice flakes are cooked and soft to the touch.
 It takes about 15 - 20 mins. 
In a seperate pan roast the cashews and almond to golden brown in about a tblsp of ghee.
Add this to the reduced payasam and switch off the stove.
The payasam/gheer will thicken as it cools down.
Serves about 5-6 people.


Have a nice weekend ! 

Tuesday, December 06, 2011

Spinach Masala Vadai

A crispy snack for the upcoming cold evenings and also a great way to use up the left over spinach:)

Ingredients :
1 cup Channa dhal
1/4 cup Thoor dhal
1/4 cup Urad dhal
2 cloves garlic (optional)
1 inch piece Ginger
1tblsp Fennel seeds
5-6 red chillies
Handful of currry leaves chopped finely
2 cups Spinach, chopped finely
1 cup of onion chopped finely
3 green chillies finely chopped

Method:
Soak all the dhals together for about 2 hours. 
Grind them coarsely without adding water along with the fennel and red chillies.Sprinkle some water if needed.
Take the mixture in a wide bowl.Add chopped ginger, garlic onions,green chillies, curry leaves ,spinach and required amont of salt.
Mix well and make small balls out of the dough.
Heat up the oil in a deep pot, flatten the ball and slide it to the oil. 
Fry till crispy and golden brown.
You can fry 4-5 vadai at a time.


Note:
The onion must be chopped finely for the vadais to be intact, otherwise it will break up in the oil.
Take care while adding salt as spinach already has some natural saltness 
Do not use frozen spinach for this recipe.
If the dough is loose add couple of tsp's of besan flour to thicken it.


Friday, November 18, 2011

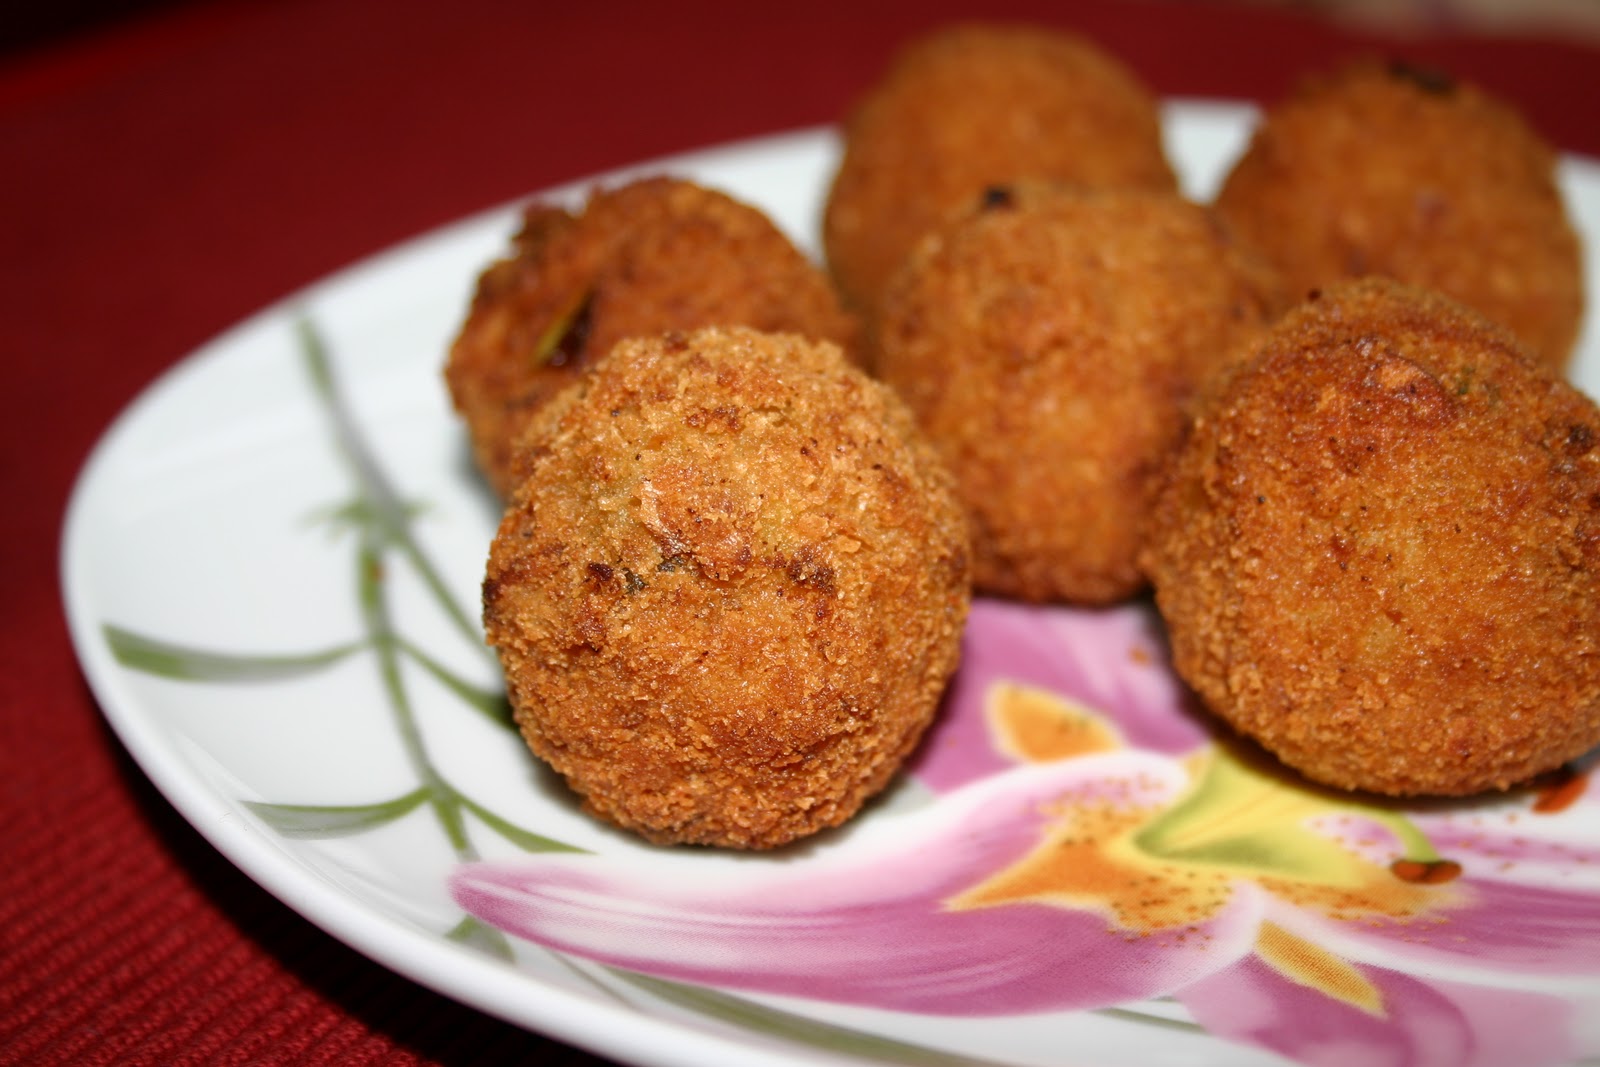
Potato Mushroom Croquettes

This post is after a very long break, say about 6 months. Well,  this past 6 months has kept us very busy with moving from one place to another. First we packed our things and  moved back to Chennai from Brussels and then after  couple of months moved to a new house in Chennai. When we were just getting settled comfortably in our new home my husband got an offer at work to move to United States. So here we are now, back in the US trying to adjust to the weather from very hot to cold. But I must say that the weather is pretty nice and warm for the past few weeks in the New England area except for the surprise early snowfall in the mid-October.
While my son is slowly getting settled with his school routine, I thought its high time I write a post in the blog before life gets busy again..you never know :)
When I was clearing out some not so good pictures from my blogged and non-blogged folders (Thanks to Cham for that neat idea, it really helps a lot), I came across this picture of the potato and mushroom croquettes that I made way back on one cold evening in Brussels.
Here goes the recipe...


Potato and Mushroom Croquettes
Ingredients:
2 large potatoes
1 medium onion , finely chopped
2 cloves garlic, finely chopped
1 inch piece of ginger, finely chopped
1 green chilli finely chopped
2 cups of finely chopped mushrooms.
1/2 tsp chilli powder
1/2 tsp chat masala powder
1/2 tsp jeera powder
1 tsp lemon juice
3 tblsp finely chopped coriander leaves
oil and salt as required
2 cups of bread crumbs for rolling


Method
Boil the Mash the potatoes
Wash the mushrooms in running water and wipe with a clean kitchen towel.
Finely chop the mushrooms, onion, garlic, ginger, and green chilles.
Add 2 tblsp of oil in a pan. Add the chopped onions, garlic, ginger and chilies, stir well till the onions are translucent. Now add the chopped mushrooms and saute on medium flame.
To this add chilli powder, cumin powder, chat masala powder, and the salt.
Stir well to combine for about 2 mins. Just when the mushrooms are wilted, add the mashed potatoes, coriander, lemon juice and stir well to combine.
Switch of the stove and allow it to cool completely.


Make small balls or roll it into logs .Take the bread crumbs in a plate.
Heat the oil in a deep pan. Roll the balls in the bread crumbs and fry them 4 at a time in the medium heat oil .
Slightly turn the balls using a slotted spoon for even browning on all sides.
Enjoy with a cup of tea :)


Notes: 
  • Do not immerse the mushrooms in a pot of water for washing as it will soak up the water and release it while cooking.Always wash with minimum running water from the tap, or wipe with a damp kitchen towel
  • If the potato mixture is mushy add about a 1/4 cup of bread crumbs to the mixture. Keeping it in the fridge  for 30 mins also helps tighten the potato mixture.
  • If you are out of Chat masala, add about 1/4 tsp of garam masala and 1/2 tsp of amchoor powder.

Tuesday, April 19, 2011

Kadalaimaavu Paniyaram / Besan Kasuri Methi Paniyaram

Here's a quick and easy snack that can be made in about 20 mins. Since the non-stick paniyaram kal is used very little amount of oil goes into this, making it a healthy low fat snack. 


Ingredients:
1 cup Kadalai maavu /Besan
1/4 cup Rice flour
1/2 tsp Baking powder
1/4 tsp Baking soda (optional)
1/2 tsp salt
1 tsp Chilli powder/ chopped green chilllies
1 tblsp Kasuri Methi
1 cup thinly sliced Onions
1/2 tsp  hing/Asoefotida
11/2 cup water


Method:
Mix all the dry ingredients in a bowl and mix well using a whisk for about 2 mins.
Then add the onions and mix well with about a cup  and half of water. 
The consistency should be slightly thicker than Idly batter. 
Allow the batter to rest for atleast 10 mins
Heat up the paniyaram pan or the appe pan  add 1/4 tsp of oil in each mould.
Add a tblsp full of the batter in each of the mould and cook covered for a minute in medium heat.
Remove the lid and flip the paniyarams gently to the other side.
Cook till golden brown.
Serve with any chutney or sauce.


Notes:
Resting the batter for atleast 10 mins results in soft and fluffy paniyarams.
You can increase or decrease the spice level as per your taste.
Baking soda is absolutely optional, the result is good even without using it.
If you don't have a paniyaram kal, use the same ingredients(except the baking powder) to make soft pakoda's deep fried in oil, comes out really good.

Monday, January 24, 2011

Gobi Manchurian Dry - My version

Here's my version of gobi manchurian, that I tend to make often during these cold and chilly evenings. What else can beat this cold winter other than hot and spicy food :)
Gobi Manchurian has always been a nightmare to me and I have failed miserably many times in the past. But the following measurements, took out from a local magazine works well for me and nowadays I make it in a jiffy.
This is a easy to make dish if you have all the sauces ready at home. Try to use the light soy sauce and a hot variety of chilli sauce. I used the malaysian hot sauce - sambal olek, really spicy. Spring onion is a must as it adds a nice flavour to the dish.


Ingredients:
For frying:
1 medium cauliflower cut into florets.
1 tsp soy sauce
1 tsp chilli sauce
salt as per need
1/ 2 cup All Purpose/Maida flour
1/2 cup Corn flour
One handful of Riceflour


For the sauce:
1/2 cup of onion thinly sliced
1/4 cup of capsicum thinly sliced (optional)
1 green chilly, chopped 
1/2 cup chopped spring onions
1 tablespoon chopped garlic
1 tablespoon chopped ginger

1 tablespoon soy sauce
1 tsp Chilli sauce
1 tablespoon tomato ketchup ( or ) 1 tablespoon tomato paste +1/2 tsp sugar
a pinch of red colour (optional)


Method:
Wash and cook the florets in microwave for about 4 mins. Drain and cool in a colander.
The above step helps to reduce the cooking time in oil. But its optional, you can also fry them directly.
Marinate the cauliflower with soysauce, chillisauce and salt for about 10 mins.
Heat oil in a frying pan.
Just when you are ready to fry, toss all the flour into the marinated florets. Mix well to coat.
Drop the florets in the oil and fry till crisp. Drain on a paper towel and keep aside.


Heat a pan with 2 tablespoon of oil.
Add the ginger, garlic, onion , green chilli and saute on high heat.
Now add the soy sauce, chilli sauce, salt, tomato ketchup and the red food colour and mix well .
Now toss in the fried cauliflower and the chopped spring onions, stir well to coat.
Serve hot .


Note: 
Do not mix the flours well before frying, as it tends to get soggy by the time you finish frying. Just add them when you are all set for frying. 
Make sure there's no water in the cauliflower mixture before adding the flours.
Add some more corn flour if gets soggy.
Since the soy sauce has it own salt, make sure to add very little salt while sauting the veggies.

We are going on a short vacation to Spain middle of this week, So this space is going to be silent for another week, See you all after that :)

Tuesday, December 14, 2010

KFC style Fried Chicken

Have you ever wondered how the combination of just flour, salt, pepper and chicken can taste so good?
I have, many a times, whenever I happen to snack at KFC. Back in 2000 when I came to US for the first time, I was so much addicted to this food, that this became the evening snack on the way back home from work.  Ahh..those carefree days...:)

Last week I made these for my kid. Something interesting for him to eat as he was giving me a hard time, literally eating nothing for the past two weeks because of cough and cold. He seemed to like it and had a few pieces, which made me happy..:)


Ingredients:
Boneless chicken pieces , cut into thin strips
salt and pepper as required
1 egg
2 cups all purpose flour

Method:
Marinate the chicken with little salt and  pepper.
Break an egg in a wide bowl, add salt and pepper, and whisk well
Take the flour in a plate .

Heat oil in a saucepan for frying.
Dip the chicken in egg , and the coat with flour, again dip in the egg and coat with the flour.
Drop in the hot oil and fry till golden.
Serve with your favorite sauce.


Note:
Dipping the chicken twice in egg gives a nice crunchy layer, but its up to the individual's taste. To make it more spicy, you can also add some hot sauce to the egg.


Tuesday, May 25, 2010

Cabbage Pakoda and some scenic pictures from Austria

Last week was pretty exciting  for us as we went on a 5 day trip to Austria and Venice.
Austria was gorgeous and Venice was too beautiful. With nothing much to say, I want to share a few pictures from the trip  for you all to see what we saw and a recipe for quick snack.


Snow Clad Alps...


Bright and sunny Venice..


Now coming to recipe...

Cabbage Pakoda:

2 cups shredded cabbage.
1/2 cup thinly sliced onions
1 cup Besan flour
1/2 cup rice flour
1/2 tsp chilli powder
1 green chilli finely chopped.
1 tsp crushed coriander seeds.
1/2 tsp chat masala(optional)
Curry leaves(optional)

Method.

Mix all the ingredients in a large bowl along with the required amount of salt.
Sprinkle 1/2 cup of water and mix gently.
Heat up oil in a deep sauce pan in medium high heat.
Drop the cabbage mixture in irregular shapes , 4-5 at a time.
Fry till golden brown.Enjoy with a cup of tea.


Have a nice week ahead

Tuesday, May 04, 2010

Bread Rolls/Parcels

Though I have read about bread rolls several times in many cookbooks, magazines, blogs, and foodwebsites I have never tried it until recently for a potluck lunch. It didnt soak much oil as I initially thought and it retained its crispiness even after few hours.I have made it twice after that and it came out very well each time. Makes a great party starter.

The recipe for the filling is very versatile, and you can make it according to your tastebuds. This is how I made it.
This recipe make 10-12 bread rolls

For the Filling:
Ingredients:

4 medium potatoes 
1 tsp ginger garlic paste
1 medium onion chopped

1 tsp jeera
1 tsp chilli powder
1/2 tsp garam masala powder
1 tsp chat masala powder.
1 tblsp lemon juice

Method.
Boil the potatoes, peel the skin and mash it .
Add 2 tblsp oil in a pan and add the cumin seeds.
When it crackles add the chopped onion and saute well.
To this add the ginger garlic paste, and all the dry powders and fry till the raw smell disappears. Sprinkle some water if necessary.
Now add the mashed potatoes, and mix well with the masala.
Finally add salt, chopped coriander leaves  and lemon juice, mix well to combine.

For the Rolls:

Ingredients.

12 slices white bread.
a bowl of water.
2 cups bread crumbs
oil for frying

Method:
Trim the edges of the bread and keep aside.
Take each slice , dip in the water, keep inbetween your hands and squeeze out the water.
Spread the sqeezed bread slice on a flat surface, place the filling towards one edge, roll it and seal the edges by slightly pressing them.
Roll it over the bread crumbs and fry in hot oil.

Note: The oil should be hot , not smoking hot. Coat the rolls well with bread crumbs and pat it your palms before dropping it in oil.This helps in shedding the excess crumbs, that might clog the oil.

Thursday, April 15, 2010

Javvarisi Murruku / Sago Murruku for Indian Cooking Challenge

Making this murruku  for this months ICC was a new experience for me in two aspects, one was the javvarisi part and the other was besan part. Never tried a murruku with kadalai maavu in it. I had a packet of Javaraisi with me, which I got from India, but it has been a year now,but 
I tried with that and as suspected it didnt soak well , even after 5 hours.  I was very scared to use that one in the murruku, after reading srivalli's fire crackers experience. I have already done that once with 'seedai' experiment and didnt want to undergo that again. So I gave it a pulse in the mixer and made the dough out of it.


The murruku turned out very well. When I made the first batch, I was almost 4 feet away from the oil pot hoping some rockets might come out of it. You see it was such a bad experience with seedai the first time. As the first batch went well, I happily made the rest within an hour.
I liked the taste of the murruku, quite different from what I regularly make.

Ingredients:
Rice Flour 2 cups

Besan flour 1/2 cup
Fried gram flour - 1/2 cup
Sago - 1/2 cup
Buttermilk 1 cup
chilli powder 1/2 tsp

Method:
Soak the Sago in 1 cup Buttermilk for 5-6 hrs,minimum 2 hrs. Add some more water after 2 hrs if all buttermilk is absorbed by the Sago. If its still not soaked well after 5 hrs give it a pulse in mixer.That what I did.
Powder the Dalia/Pottukadalai  in the mixer and sieve it well.
Mix all the dry flours , salt and chilli powder.Stir well to combine.
Now add the soaked Javvarrisi/sago and mix well. Add water little by little if required and knead to form a chappati dough consistency.
Heat up oil in a deep pot and press the dough directly into the hot oil using the murruku press. Reduce the heat to medium and take out once it turns golden brown.


Hope you all enjoyed making this months challenge as well as reading about it in other blogs.

Monday, February 15, 2010

Moong Dhal Kachori for ICC


Well, I missed the last months challenge, but as soon as I saw the topic of this month's ICC I was all up for it as it is one of my favourite chat item next to Pav bhaji. Indian Cooking Challenge is an event started by Srivalli , where she challenges everyone of us with a unique Indian dish.

I was very much comfortable with the recipe and decided to do the moong dhal version.The only difficulty I faced was grinding the moong dhal. I only have  a big blender which can grind large quantities, perfect for grinding Idli dough. Since I used a small qualtity of the dhal, I managed to pound it  by hand using my small mortar and pestle.
 As Valli has mentioned in her post, the temperature of the oil is very important for this snack to turn out crispy and perfect. For me the first couple of them puffed up beautifully, but as the oil got heated up slowly, the second batch didnt do that good. Then after some adjustments on the heat the rest of the batch came out really good.

Oh..Thats my little one sneaking his hands in while Iam taking the picture...he couln't wait to taste one..

Recipe as given by Srivalli:
I halved the ingredients to make about 8 kachori's. I have given my measurements on the side in a different colour.

Kachoris

Adapated from Medhaa's Aunty and Tarla Dalal
Resting Time for the Dough is app 1/2 hr - 1 hr
Frying time for the Kachoris - 20 mins for each batch app.
Soaking Time for the Filling is app. 1 hr
Cooking Time for the Filling is app 15 mins


Yields - 15 ( 8 for me)
For the Dough
Ingredients Needed:
All purpose flour / Maida - 2 cups  (1 cup)
Oil/ Ghee - 1/4 cup , ( 3 tblsp)
Salt - 1/2 tsp
Water for kneading


Method
Mix the flour and salt, Add the oil/ghee and mix till you get a bread crumbs texture.
Slowly add water and make a soft dough. Knead well for about 8 minutes.
Cover and keep aside to rest for atleast half hour.

Special Tips / Notes for the dough:
Keep the dough covered at all times, if not it will dry up and not puff up when frying. If the dough is made right wet cloth can be used if not just a towel.
The dough could spring back for many reasons:
Dough is too cold (If wet cloth is used)
Dough is not soft enough.
Not kneaded for enough time.
Oil is less.
Not rested enough.

Fillings
Ingredients Needed:
Split Moong Dal (yellow) - 1/2 cup (1/4 cup)
Cumin Seeds - 1 tsp  (1/2 tsp)
Hing / Asafoetida - a pinch
Curry Leaves - 2 tsp chopped fine (opt)
Green Chilli - Ginger paste - 1 tsp  ( I didnt use)
Sauf / Fennel seeds powder - 1 tsp (1/2 tsp)
Garam Masala - 1/2 tsp  (1/4 tsp)
Red Chilli powder - 1/2 tsp (1/4 tsp)
Mango powder / Amchur - 1 tsp (1/2 tsp)
Oil - 1 tsp
Salt to taste

Method
1. Wask and Soak dal in water for atleast 1 hour. You can go upto 4 hours not more.
2. Drain the water well.
3. Grind the dal to a coarsely. (Will resemble Idli Rawa)
4. Heat oil in a pan.
5. Add the hing and cumin seeds.
6. Once the seeds splutter add the curry leaves.
7. Add the dal.
8. Lower the heat and keep stirring for 5 minutes till the dal stops sticking to the pan.
9. Cook for another 10 minutes on low till the dal turns slightly brown.
10. Add all the masalas.
11. Cook for few minutes till the aroma of the spices hit you.
12. Add Salt.
13. Remove from heat and keep aside to cool.

The fillings have to be really dry if not when rolling they will ooze out when rolling.

Adjust the masalas according to your taste. What is given in this recipe is spicy to the extent one can still enjoy.
For idea on pressing the filled kachori, check out Manjula's method. If you try to press out using a rolling pin, the filling may come out and make holes in the kachori.
Fry the kachori's on medium low to get a crisp outer layer, that is the key. For people using electric stove, the numbers can be going from 6 to 4.

To Make Kachori's


Make a small ball from the dough. Roll out into a 2 inch diameter circle. Or flatten the ball using your fingers having the center thick and sides little thin.
Place about 1.5 tsp of the filling in the center of the rolled dough.
Cover the filling with the dough by slowly stretching it over the filling. Seal the ends and remove excess dough. Repeat with all the balls and keep aside for 5 -7 mins.
Then using your palm, flatten the balls by lightly pressing it, as using the rolling pin will make the filling come out. (See notes below). Keep aside covered. Repeat with the remaining dough.
Meanwhile heat some oil for deep frying. The oil should not become smoking hot. Test to see if the temperature is right by dropping a tiny ball of dough and see if it is rising slowly to the top.
Here is a picture of the kachori's filled, flattened, pressed and ready to be fried.

Drop the kachoris in batches of 3-4 gently into the oil. It should rise up slowly. If you don't want to use lot of oil, use just enough for two or three at a time and fry them.
After it rises up (about 2 minutes), turn it over.
Cook for about 6 to 10 minutes till the side down gets a golden brown color.
Turn and cook the other side for another 6 minutes or till its golden brown in color.
Remove when done, cool and store in airtight container.
Serve with coriander chutney and tamarind chutney


Special Tips / Notes for making the Kachoris:


You can fry 3 kachori's at a time.
The oil should be at a heat when you drop some dough it should come up slowly, if the dough comes up too fast the oil is too hot, if it does not come up then the oil is cold.
It will not be crisp if the oil is too hot.


This recipe is definitely a Keeper...Thanks Srivalli for this recipe and for the event.
It gives us an oppurtunity to try out different new and unique snacks and sweets.
Related Posts with Thumbnails