Tuesday, June 11, 2013

Princess Barbie Cake.

Made this cake a few weeks back for the sweetest little one (my SIL 's daughter) in our family.
Simply followed the instructions from Here.


I started out making the cake a day earlier. Used a 8 inch round tin and a 8 inch bowl for the cake as mentioned in the video, but just when assembling the cake I realized that the dolls legs were longer than I expected. With no time to bake another cake my sister-in-law and me decided to do some adjustment. We used a hollow round tiffin box, stuffed with cake scraps and made the barbie stand on that. Glad I was able to pull it through and was much delighted to see the surprise in the little ones eyes.

So if you plan to make a princess cake, measure the dolls size before baking the cake :)


Monday, June 03, 2013

Summer Colours from my Small Garden

Its too late to say spring colours but the rain showers this morning made me feel like spring after a super hot weekend.It was nice to see all the flowers and plants drenched in raindrops, definitely felt that they enjoyed the rain more than we did.
Here are few pictures from our small garden space in the front.

I was so excited to see the first rose flower of the season.
 " A Rose is a Rose"  - King of flowers :)

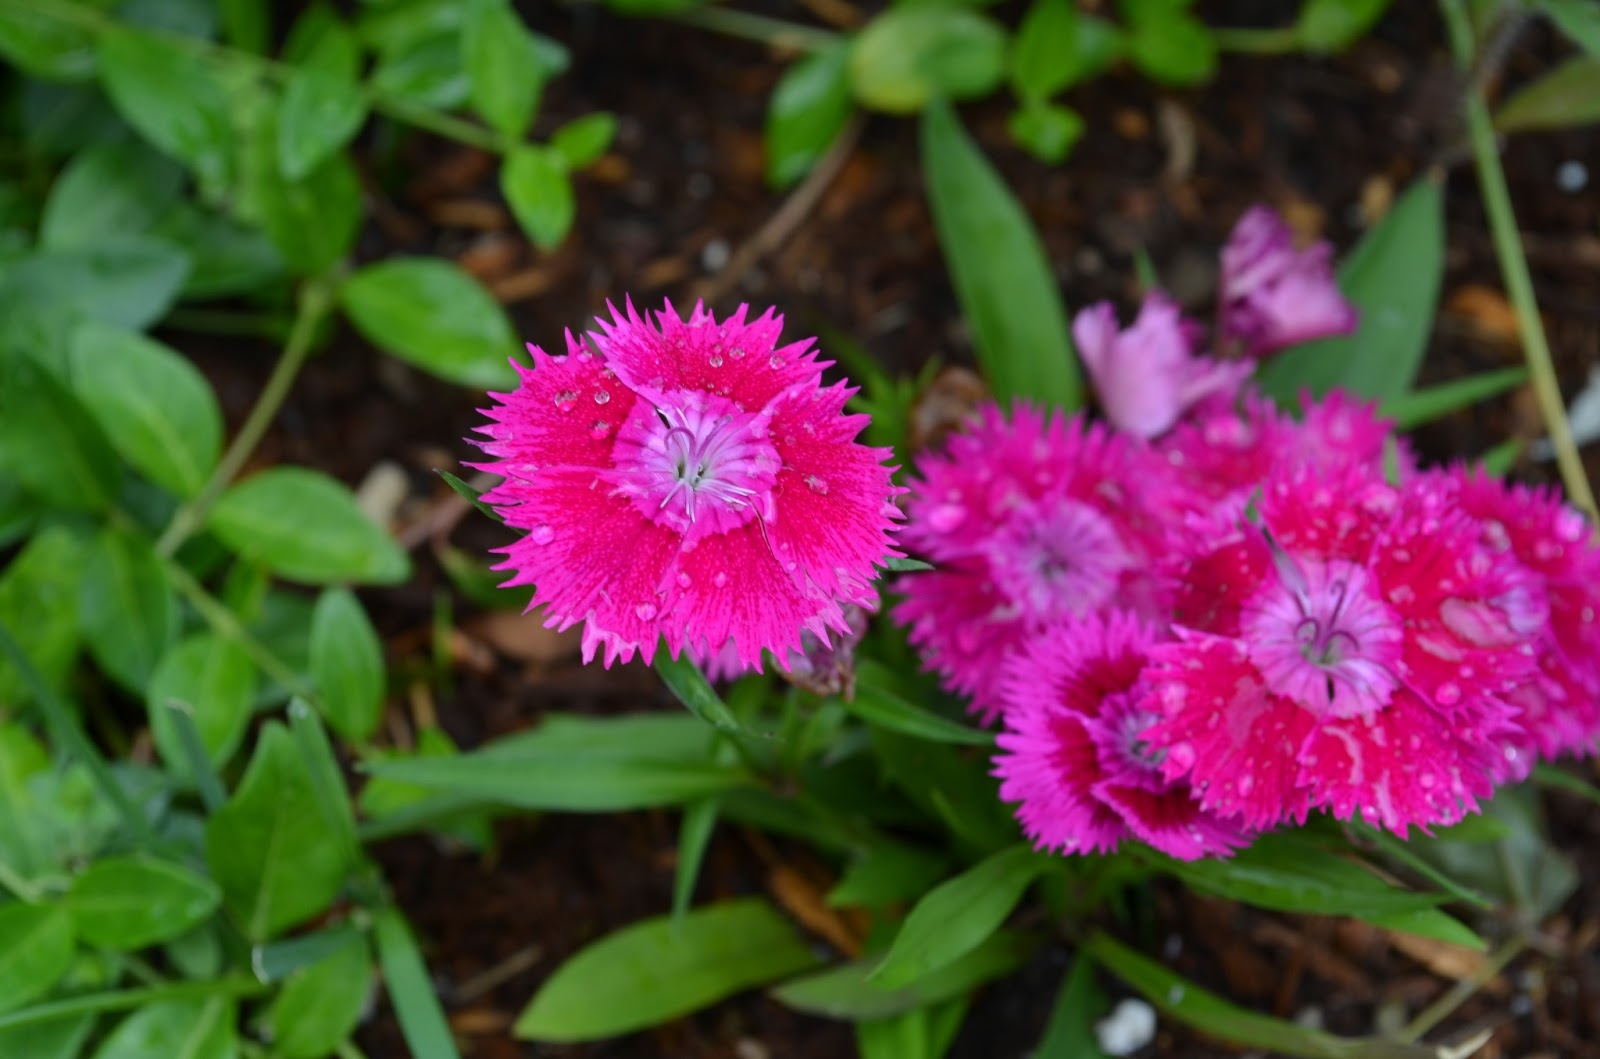
Do you know this flower. I 'm so fascinated by this beauty. It comes in various colors, white, pink, peach..I t was beautiful when it was fresh two weeks back.


These are tiny plants, that bring such beauty and color to the landscape.


Love those raindrops :)


Last but not the least, My Pea Plants started blooming too in my patio.
We tried this plant, just for fun as my son insisted that he wants to grow peas. Turns out that this is one of the easiest to grow. All my other ambitious seedlings are still struggling to grow in this great New England weather :)


Monday, April 15, 2013

Paruppu Poli / Puran Poli/ Obbattu

Wish everyone of you a very Happy Tamil New Year and Vishu.

I felt so happy that this new year came in during a weekend, had all the time to prepare an elaborate feast  just like back home with all the must do delicacies like vadai, payasam etc.,Amma always prepares sarkarai pongal, but I cut down on it as I made these delicious Poli's for breakfast.
 I happened to taste my first poli only when I was in college in coimbatore. The aunty who ran the mess for us over there made such awesome obattu's that I completely fell in love with them.
Amma never made this at home, but I have watched my MIL make this every year for bhogi pongal.
So here is the recipe from the beloved aunty combined with the few tricks from my MIL.


Ingredients:

1 cup Maida
1/2 cup water
3 tblsp gingelly oil
1/4 tsp turmeric powder
Ghee as per taste

For Poornam
1 cup channa dhal
1/2 cup jaggery
1/2 tsp cardomom p[owder
3 tblsp shredded coconut

Method:
Mix the maida with water and knead well to make a smooth dough. Add the gingelly oil and knead again so that oil is well absorbed. Keep it covered in a container for a minimum of 2 hours. The longer the resting time, the softer the poli's will be. Resting the dough overnight also helps in making soft poli's.

For the poornam:
Soak the channa dhal for two hours. Cook in a pressure cooker for 3 - 4 whistles.
Filter the water in a strainer and mash it well to a smooth paste.
Take the jaggery  in a sauce pan, add about 1/4 cup water to it and allow to melt.
Once the jagggery is melted and filter to remove any impurities.
Add it again to the sauce pan and bring it to a boil. Add the cardamom powder and the mashed dhal.
Cook till it becomes  thick. Add the coconut at this stage and mix well.
Stir well in low heat for about 2 mins. Allow it to cool completely.


Method of making poli's:
Make equal sized balls of the dough. Make same size balls out of the poornam
Place the poornam in the middle of the flattenned dough, bring the edges of the dough together and seal the poornam completely.
Place the dough in between two plastic sheets smeared with oil and press the dough to form a thin circle. You can also use a roller and roll it gently to thin circles.
Gently remove the plastic sheet and place it on medium hot tawa/griddle.
Add little oil/ghee around the edges and cook by flipping the sides.
The Poli is done when brown spots appear on the top.
Apply little ghee on the top after taking out from the pan.

Notes:
 Make sure the stove is on medium heat, else the poli will be over cooked and turn rubbery.


Sunday, March 17, 2013

Black Bean and Avocado Tacos

Made this super simple tacos's for dinner yesterday. This is a great treat for those who love avocado and also to those who want to try and introduce avocado into their diet. Kids will go crazy over this dish,if you top it over with some extra shredded cheese,  mine just loved it without the cheese.


Ingredients:
1 tin black beans
1 firm and ripe Avacado
1 medium onion
1 medium tomato
1 tsp cuminpowder
1/2 tsp chilli powder
2 tblsp chopped cilantro
1 tblsp lemon juice
10 taco shells
salt and pepper as required.

Method:
Open the black bean tin and filter the water through the strainer. Rinse the beans twice with water and drain completely.
Add 2 tsp of olive oil in a pan, and add half of the chopped onions, saute till translucent. 
To this add the blackbeans, chilli powder,cumin powder and salt.Mix thoroughly and cook for 5 mins in medium heat. Switch of the stove and allow to cool.


For the guacamole - cut the avocado into two, remove the seed and scoop out the pulp into a bowl.
To this add the rest of the chopped onion, tomato, cilantro salt, lemon juice, salt and pepper to taste. Mix well.
To Assemble - To each of the taco shell add about 2 tblsp of beans and 2 tblsp of the guacomole. Top it up with shreeded cheese if desired.


Notes:
Soaked and cooked Rajma/Kidneybeans can also be used instead of store bought black beans tin
Shredded lettuce also adds another layer and crunch to the tacos.
The same mixture can also be rolled into a burrito using Tortilla's


Wednesday, February 20, 2013

Vada Curry - Old Recipe With New Pictures

This is one of the initial recipes I posted as soon as started my blog. Though the pictures are not so good this remains the most popular recipe of this blog till date. So when I got a new SLR camera this weekend, I got all excited and planned to give the pictures for this recipe a makeover .

Click here to read my old post.

This is one my Mom's classic and she never fails to make this whenever I visit. This recipe is different from the hotel version calorie wise as the vada's are not deep fried instead made by crumbling thick Adai/Dosa, which gives a unique flavor to the dish. It doesnt take muchtime, if we plan a little ahead. My mom alwys soaks the dhal and makes the adai the previous day night, and then crumble them in the morning to make this delicious side dish. I am re-posting the recipe here.


Ingredients:
1/2 cup channa dhal (soaked for two hours)
1/2 cup Thoor dhal
1tsp fennel seeds
1 tsp jeera

1 inch cinnamon strip
3 cloves
1 bay leaf
1 tsp fennel seeds
3 tblsp ginger garlic paste
 2 green chillies , slit
1 medium sized onion chopped finely
2 medium sized tomatoes chopped finely
1 cup chopped coriander leaves
1tsp chilli powder
2 tsp coriander powder
1/2 tsp tumeric powder
salt as needed
Method:
For Vada/Adai:


 Soak the channa dhal for two hours and grind it coarsly along with fennel seeds(like we do for masal vadai).Heat a dosa pan and make thick adai's(about 2 inch thickness) by adding little oil on the sides.Keep the heat in medium and allow it to cook well, until browned on both sides(as shown in picture above).Cool it and scramble it into tiny pieces.You can do this the night before, store it in refrigerator and use it the next morning. 

For Curry:
Add 2 tsp of oil in a sauce pan.
Add cinnamon, cloves , fennel, and bay leaf to it.
When the cloves pop add the chopped onions and fry till translucent.
Add the ginger garlic paste.Fry well till the raw smell goes.
Add the chopped tomatoes to it and fry till mashed well and the oil leaves the surface.
Now add all the powders and stir well till the masala mixes well with the tomatoes.
Now add about 4 cups of water.It should be very watery at this stage.
Close with a lid and allow it to boil. After 10 mins, add the scrambled adai/vadai pieces to this liquid and mix well.
Simmer in very low flame for 10 mins.
The chana dhal mixture will soak up all the liquid. Add the chopped coriander leaves and stir well.


Enjoy with hot steaming idlies or spongy dosa's

Sunday, February 17, 2013

Mini Heart Shaped Apple Pies

This post was intended to be posted on Feb 14th, got caught up in the usual working day routine so much, that I was not even able to get near the laptop. Hope you all had a great valentines Day.
Coming to the recipe, this is a super simple one which could be made in minutes if you have couple of apples and any type of pastry sheet in hand. I used the Empanada sheets which tasted crisp and just perfect. This dish can be made for any occasion with different shape and also different fillings, strawberry and ricotta cheese is another great combination. 
I am already thinking about many variations for fillings, both sweet and savory.


Ingredients: 
1 Apple , peeled and chopped 
1 tblsp brown sugar
1 tsp cinnamon
1 tsp melted butter
1 tsp lemon juice
Any type of pastry sheets. cut into heart shapes.
(I used empanada shells , frozen)


Method:
Preheat the oven to 400F
Mix the brown sugar, cinnamon, melted butter, lemon juice and apples, keep aside for 10 mins.
Place about a table spoon of the apple mixture in the centre of the cut out pastry sheet.
Cover with another cut out pastry sheet. press the edges using a fork.
Place them in a parchment lined cookie tray. Prick the top with fork, couple of times.

Beat 1 egg in a small bowl and brush the top of the pastry with beaten egg
Bake for 15-20 mins.


Cool before serving. Enjoy with Chocolate syrup or Ice cream.

Note:
Do not over fill the pastry, else it will ooze out.
 If the apple mixture is watery, filter the water out of it.
Set the oven temperature as per the instructions in the pastry sheet that you are using. Mine said 400F. 


Notes:

Set the oven temperature as per the instructions in the pastry sheet that you are using. Mine said 400F. 


Sending this post out to Priya's "Valentine's Day Contest" 


Wednesday, February 06, 2013

Baby Boots Cake - Baby shower cake.

Here is a picture of a baby shower cake in the form of baby booties. I made these for a friend of mine who delivered a beautiful baby girl last weekend.
I made this cake from two loaf cakes cut into two halves. Decorate by piping squiggles on the cake imitating the knitting patterns. Let me know what you guys think.


Thursday, January 31, 2013

Peanut Blossoms Cookie

Feels great to blog after a long time. I tried many news recipes during the break, took pictures and stacked them all in folders, waiting for the right moment I guess. Finally today I got the interest to just type a new post in my beloved blog.I wish my spirit continues this way the rest of the year.
I tried out this peanut blossom cookie couple of months back, during the holiday time from a Pillsbury recipe contest book that I borrowed from the library. 
Try this out. This is a great cookie recipe to bake with kids.


Ingredients:

1 3/4 cups All purpose flour
1/2 cup sugar
1/2 cup firmly packed brown sugar
1 tsp Baking soda
1/2 tsp salt
1/2 cup Shortening /Butter
1/2 cup peanut butter
2 tblsp milk
1 tsp Vanilla essence
1 egg
Sugar for sprinkling
48 Kisses Candy drops

Method:
Preheat the oven to 375F
Whisk in flour, baking soda, and salt.
In a large bowl add all the ingredients and mix in low speed until stiff dough forms.
Shape into 1 inch balls and roll in sugar.Place 2 inch apart in a baking sheet and  bake for 10 - 12 mins
Immediatly after taking out from the oven top each cookie with one milk chocolate,  presing down firmly so that the cookie cracks down.


Enjoy with a glass of milk.


Thursday, July 19, 2012

Spicy Flax Meal Podi and Spinach Rice.

Flax seeds was something new to me when I saw bloggers using them in their baking as a replacement for egg. I started trying this in my baking experiments and to my surprise the baked goodies turned out super soft and moist. I got over excited and got a big bag of Flax meal from whole foods couple of months back.Though Flax seeds is a good source of Omega 3 fatty acids, it has very poor shelf life. So I always keep it sealed in the refrigerator. In my quest to find different ways to use that bag of flax meal , I came across this recipe for FlaxMeal and Peanut Podi from Usha's VegInspirations. Needless to say about her blog, she has so many recipes anything healthy :)
We use this podi as multipurpose podi for rice, Idli, dosa etc.,


I did not use Jaggery as in her recipe,except that I followed the same::
Ingredients: 
1 cup raw unsalted peanuts.( I used the roasted , lightly salted ones)
1/2 cup sesame seeds (white)
1/2 cup Channa dhal
1/2 cup blach gram dhal with skin( I used whole urad dhal)
1/2 cup flax seed meal
8 red chillies ( I used very less compared to her recipe, add more if you like it really spicy)

How to make the powder:
Dry roast each of the ingredients one by one in a low flame.Switch off the stove and add the Flax meal in the pan and give it a toss. Cool all the ingredients and powder it your dry/spice grinder.Do not make it to smooth powder. Store it in an airtight container.


This Spinach rice is one of my recipe which I experimented with this podi...The peanuts in the podi and spinach compliments each other. Perfect lunch box dish.

Ingredients:
1 cup cooked rice
2 cups roughly chopped spinach
1/2 cup chopped onions
2 cloves of garlic finely minced
1 tsp jeera/cumin seeds
curry leaves (optional)
turmeric optional (I did not use this)
2 tblsp of Flaxseed podi
1tsp lemon juice

Method:
In a wide pan add 2 tblsp of olive oil, 
To this add cumin seeds and wait till it splutters.
Now add the onions and chopped garlic  fry till slightly brown
To this add the chopped spinach and stir fry till wilts completly.
Add salt and turmeric, mix well.
Now add the cooked rice and mix well.
Switch off the stove, add the Flax seeds podi and mix well to combine.
Finally add the lemon juice and gently stir the rice.
Serve with Raita.
.


Sunday, July 08, 2012

Simple Pasta with Zucchini

Zucchini/courgettes is one of my favorite vegetable. I try to make a wide range of dishes from soups to dhals and curries, during summer when the vegetable tastes its best.This is a super simple recipe, which I happened to taste in a small motel /restaurant in  Rome.We reached the place very late in the night after a hectic flight journey from Brussels, the motel owner who himself was a chef was very kind enough to whip up this quick pasta for us at that time of the night. This is a perfect example of great food with less, but good quality ingredients.


Ingredients


4 tblsp extra virgin olive oil.
2 zucchini cut into bite sized pieces
4 cloves garlic
2 tblsp coarse pepper.
1/2 tsp dried oregano
Any pasta of your choice.(I used Rigatoni)


Method:
Cook the pasta as per the package instructions
Heat the oil in a wide pan, add garlic and fry for a minute.
Add the zucchini piece and stir for about 2 - 3 minutes
Add the dried oregano, mix well.
Now add the cooked pasta and toss well to coat.
 Finally add the coarse black pepper and mix well.
Enjoy with soup or salad.


Sending this recipe to Priya's VFAM - Zucchini event guest hosted at Vardhini's.

Monday, June 25, 2012

Tofu Tikka Masala

I am so glad to be writing a post in my beloved blog after a long break. One week of blogging break has extended into few long weeks. Life has become very hectic, with new job and a hyper active pre-schooler leaving no time for not only blogging but also cooking.
Past Friday I managed to make something interesting to break the monotomy, actually I tried to use what was the only thing left over in the refrigerator. This recipe is slightly adapted from  Mansi's Fun and Food cafe and is definitely a keeper.


Ingredients:
For marinade:
1 pack Extra firm Tofu
1 Red bell pepper, cubed(optional)
1/2 cup yoghurt
1 tsp tandhoori masala (optional)
1/2 tsp chilli powder
1/2 tsp turmeric powder
1 tsp garam masala
2 tsp lemon juice
1/2 tsp kasuri methi powder
1 tsp oil
salt per taste.

For the Gravy:
1 medium onion, finely chopped
3 medium tomatoes, pureed
1 tsp jeera
1 bay leaf
1tblsp ginger garlic paste
1 tsp chilli powder
1tsp coriander powder
1/2 tsp crushed kasuri methi
salt to taste


Method:
Drain the water from the tofu, wrap it in layers of kitchen towel and keep it aside for about 10 mins.
Cut it into cubes and marinate with the ingredients mentioned in marinade, along with red bell pepper.
Let it sit for a minimum of 15 minutes. Puree the tomatoes and keep aside.
In a large pan, add 2 tsp of oil and the spread the marinated tofu and peppers and roast it in a medium flame till it browns on all the sides.
Heat about a tsp of oil in a sauce pan, add jeera and bay leaf when its hot.
To this add the chopped onions and fry till translucent.
Now add the ginger and garlic paste and fry till the raw smell disappears.
Now add the tomato puree, salt, chili powder and coriander powder.
 Reduce the heat and allow it to boil for 10 mins.
Finally add the fried tofu and the veggies, mix well. Add crushed kasuri methi to the gravy.
Simmer for another 5 mins in low flame.

Serve with Roti/Chapati's


Tuesday, May 22, 2012

Eggless Banana Nut Muffin

Its been a long time since I baked a muffin. I have been baking this eggless version of the simple banana muffin for quite sometime now, but I got to get the pictures only this time. Flax seeds are an excellent substitute for egg in baking recipes especially turns out well with Muffins or Quick bread recipes. 
Basic recipe for this muffin is from Saffron Hut.


Ingredients:
3 large ripe bananas
1/3 cup butter, at room temperature
1 and 1/2 cup Flour
3/4 cup brown sugar
1 tsp Baking powder
1/2 tsp Baking soda
1 tblsp Flax seeds + 3tblsp Water
1 tsp vanilla extract
1/2 cup chopped walnuts


Method:
Preheat the Oven to 375F
Soak the Flax meal with the 3 tblsp of water, allow it to sit for 10 min.
Roast the walnuts slightly in a dry pan and then chop coarsely.
Peel and mash the bananas using the back of a fork in a small bowl.
Combine the butter and sugar in a bowl and beat till they become creamy.
Sift the Flour, baking powder and baking soda together in a separate bowl.


To the butter and sugar mixture add the flax meal mixture and vanilla extract and beat well to combine.
Now add the flour mixture in batches and mix gently to combine, until no visible streaks of flour left. Its okay if  the mixture is a little lumpy.
Fold in the mashed banana and the chopped walnuts.
Spoon the mixture into the muffin pans lined with paper cups.
Bake for 15-18 mins.


Make 12 Muffins.


Wish You all a very happy and relaxing long weekend:)

Wednesday, May 16, 2012

Tomato Rice Noodles With Egg

Hope you all had a great Mother's day weekend. I sure did. I made this tomato rice noodles on Saturday morning to kick start the weekend. Its easy to make just like any regular noodles, except that this is made of rice and not maida/flour. You can skip the eggs if you don't use it, I added them to make it interesting for the kid. Quite a filling dish for a weekend brunch.


Ingredients;
3 cups of cooked noodles.
1 medium onion.
2-3 medium tomatoes
1 tsp chilli powder
2 cloves garlic finely chopped
1 tsp mustard
1 tsp urad dhal
2 eggs

Method:
Cook the noodles as per package instructions.
Wash noodles in the strainer with cold water to remove the starch if any.
In a wide pan, add 2 tblsp of oil.
Add the mustard and urad dhal when the oil is hot.
When the mustard pops add the chopped onion and fry till translucent
Now add the tomatoes and fry till the tomatoes get mushy.
Add the chilli powder and salt and fry till the pulp releases oil.
If not using egg, add the cooked noodles and stir well to combine.
If using egg, move the tomato gravy to a corner of the pan, and break open the eggs on the other side.
Allow them to set for a couple of seconds and then scarmble then till they are cooked.
Now mix the scrambled eggs along with the tomato gravy and then add the cooked noodles.
Mix in the noodles, till they are nicely coated with the tomato gravy, occasionally breaking the long strands of the noodles with the back of the ladle.
Keep in low flame uncovered for 2 mins and the switch of the stove.


Note:
I used Chinese rice noodles/Rice Vermicelli (Mie Hoen) -thin ones for making this. But we can also use the Indian rice sevai packets  like MTR for making this dish.
We can also adding some frozen peas or corn to this to make it more colorful.


Sunday, May 06, 2012

Fish Curry/Salmon Curry with Coconut.

I feel that Salmon doesn't pair up well with the South Indian fish Kulambhu. I usually make a simple salmon curry with tomato paste which I have blogged here or bake the fish like I mentioned here.But this delicious curry is my recent favorite and as salmon is loaded with Omega 3 fatty acids I make it at-least once a week now.

Ingredients:
Salmon Fillets -4 (I used frozen)
1 medium onion chopped
1 medium tomato chopped
2 tblsp chopped garlic
1 tblsp chopped ginger
1 tsp chilli powder
2 tsp coriander powder
1/2 tsp turmeric powder
1 tsp fennel/sombhu seeds
few curry leaves

To grind
3 tblsp shredded cococut
1 tblsp whole black pepper seeds
1 tblsp jeera/cumin seeds

Method:
In a wide pan, add 2 tblsp of olive oil.
To the hot oil  add the fennel seeds and curry leaves.
Now add the chopped onion, garlic and ginger, fry till the onion is browned.
Add the chopped tomatoes, salt and turmeric. Fry till the tomatoes turns mushy.
Add the chilli and the coriander powder, fry till the oil is released from the tomatoes.
Now add 1/2 cup of water, mix well and bring it to a boil. Add the fish gently , reduce the heat to medium and close with a lid.
After 5 mins open the lid and gently turn over the fish. Again close and cook for another 3 mins.
Meanwhile grind the coconut, pepper and jeera and add the paste to the gravy along with 1/2 cup of water.
Mix gently and cook till it comes to a boil. Add chopped coriander leaves and switch off the stove.


Note:
The gravy should be slightly thick and not very thin.
Do not over cook the fish, else it will turn rubbery.
If you want to avoid coconut, substitute with 3 tblsp of Dhalia /pottukadalai. Fry the chutney dhal in a pan without oil for 2 mins and then grind with pepper and jeera.

Wednesday, April 25, 2012

Collard Greens Thanni Saaru

'Thanni Saaru' is a soup like curry, made predominantly with greens and coconut milk. The slightly bitter tasting greens like drumstick leaves, Manathakali keerai, or Agathi keerai are used for this saaru.
 I experimented this dish with the fresh bunch of collard greens. Traditionally it is made with freshly made coconut milk (thin and the thicker version), but I used the coconut milk from the can. This is a great way to use collard greens apart from the porial/stir fry.


Ingredients:
3 cups chopped collard greens
1 cup coconut milk from the can
1 cup water
2 green chillies(slit) / red chillies
1 clove garlic, sliced thin
1 medium onion chopped
1 medium tomato chopped
1 tsp mustard
1/2 tsp fenugreek/methi seeds(optional)
1 tsp jeera/cumin seeds.


Method:


Wash the Collard greens and remove the center stalk from the leaf. Roll the leaf and chop finely.
Add 2 tsp of oil in a sauce pan.
When the oil is hot add mustard seeds, methi and jeera.
When the mustard pops, add the onion, garlic green chillies and fry till translucent.
Now add the tomatoes and cook till mushy Add the collard greens, and salt.
Add the water, cover and cook in medium heat for atleast 10 minutes. 
Once the greens are cooked, add the coconut milk and give it a stir.
Bring it just to a boil. Switch off just when it becomes frothy. 
Do not over boil or it will become curdled.


Enjoy with hot steamed rice.


A Baby Shower Cake | Buggy Cake

I made a baby shower cake for a friend of mine past weekend. This cake has a long story to share. I baked the cake the day before the get together and decided to decorate it late night after the kid goes to sleep. So as per plan started decorating the cake and it came pretty good . When its all done, I tried to lift it up to place the cake in the fridge, and all of a sudden I dropped it. :(  . My heart was broken completely that I could'nt think of anything else for the next half an hour. After that I did some clean up, luckily the cake was not broken, just the icing got messed up, and the wheels in the cake were broken. I manage to make two more wheels from the left over cake and somehow finished the cake again by 5.30 in the morning with  whatever left over Icing I had.

So what do u think of this Cake which got a complete makeover:(..believe me the first version came out really good..:)..But I am glad I could pull it through :)


How I made the Cake:

I baked   1 - 9 inch round  vanilla cake , and 2 -  8 inch chocolate cakes.
Cut out the shape of the buggy from the 9 inch vanilla cake. I carved the handle out of the cut out piece.
Cut two 3 inch circles out of the  8 inch chocolate cakes.

Icing used - Betty Crocker  whipped vanilla Icing for the buggy, chocolate frosting for the wheels and handle.


Thursday, April 19, 2012

Neiman Marcus Chocolate Chip Cookie

I know what you are thinking on seeing the title. No, this is not the infamous Neiman Marcus cookie recipe  which is associated with an urban legend that a lady was mistakenly charged  $250 for this recipe back in the 40's. But this one is from a little cookie book named  '500 Cookies', which claims that this is the original Neiman Marcus recipe which is also published in the store's website. The recipe calls for a tsp of instant coffee powder which gives it a unique taste and stands apart from the regular chocolate chip cookies.


Ingredients:


1/2 cup ( 1 stick) unsalted butter
1 cup light brown sugar
3 tblsp granulated sugar(optional)
1 egg
2 tsp vanilla extract
1 1/2  cups all purpose flour
1/2 tsp baking soda
1/2 tsp baking powder
1/4 tsp salt
1 1/2 tsp.instant coffee powder
1 1/2 cups(8 oz) semisweet chocolate chips.


Method:
Preheat the oven to 375F (190C).
Sift together the dry ingredients including the coffee powder.
Beat the butter and sugar together till creamy.
Add in the egg and vanilla extract.Beat well to combine.
Stir the dry ingredients into the butter mixture and mix in chocolate chips.
Roll into balls. Flatten it slightly using your fingers onto a non stick baking dish 2 in apart.
Bake for 8 to 10 mins. Cool for 10 mins.
Store in an airtight container.
Makes about 2 dozen cookies.


Tuesday, April 17, 2012

Red Swiss Chard Greens Stir Fry/Porial.

I have tried a variety of greens like turnip, collard, mustard  that are available in the US to make stir fry /porial. Each of these tasted good in its own way, but didnt get close to the authentic South Indian keerai porial (stir fry). That includes spinach too as I make only dal with spinach, the porial either turns up a little bitter or gets soggy. Recently I tried a bunch of these Red Swiss Chard for a simple stir fry with shredded coconut and am hooked to the taste ever since. It tastes more like 'Ponnanganni Keerai' that we get in back home in Chennai. (I am a great fan of that one)
 Do try this porial when you get a chance to grab a bunch of these Chard, it has such delicate taste and flavor.


Ingredients:
1 bunch of Red Swiss Chard
1 small onion finely chopped
2 green chillies/red chillies(optional)
2 tblsp shredded coconut (optional)

for tempering:
1 tsp mustard
2 tsp urad dhal
1 tsp jeera/cumin seeds

Method:

Wash the Greens well. Remove the thick part of the center stalk and then chop the greens finely
In a pan add 2 tsp of oil. When the oil is hot add the mustard, urad dhal and jeera seeds. (If using red chilli add it at this stage).
When the mustard pops, add the chopped onion, and slit green chilies
Fry till translucent .Now add the chopped greens and stir to wilt. Add salt to taste.
Reduce the flame to low, cover and cook for about 10 mins. ( no need to add water.)
Add 2 tblsp of shredded coconut , mix and switch of the stove.


Notes:
Reduce the flame to 'low' after wilting.
Do not discard the stems. Store it in a ziplog bag and use them when making sambhar or dhal, tastes delicious.
Coconut is completely optional. I did not use in this picture.


Related Posts with Thumbnails