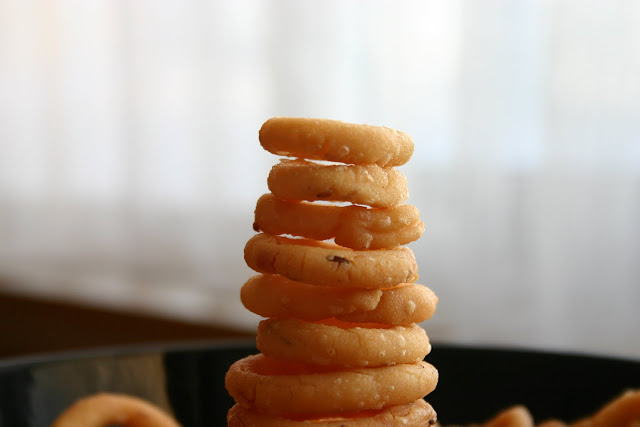
This was the recipe chosen by Srivalli for this months Indian Cooking Challenge.
As a kid I loved to eat bagsfull of this snack, never knew the name until now. I was under the perception (dont know how) that this was also made with same murruku press directly in the oil. But when I saw the recipe, was quite glad to see that it was very simple.
The great procastrinator that Iam, didnt try to make it till the last day.Attempting to make things for the challenge was itself a big challenge for me.I followed the recipe 1 to the core, but reduced the red chilli powder to half(cos of the kid) and ..huh did I mention that I forgot to soak the moongdhal.
Couldnt wait of another half an hour for the soaking, for I wanted to take the pictures in the daylight.The Sun goes off here by 4.00 pm you know.
So I microwaved the dhal for 4 minutes and that did the trick. The Ringis (thats how I want to call them) didnt complain while frying. :)
I used 11/2 cup of rice flour, half of them got over while frying.,Ofcourse it was me, couldnt resist them.
Here goes the recipe as given by Srivalli.
Ingredients Needed:
Rice Flour - 1 cup
Water - 1 cup
Split Yellow Moong dal / Pesara pappu / Mung Dal / Pasiparuppu - 1 1/2 - 2 tblsp
Cumin Seeds - 1 tsp
Sesame Seeds - 1 tsp
Chili powder - 1 tsp
Ghee or oil - 1 tblsp
Salt to taste
Oil for deep frying
Method to prepare:
Making the dough:
Soak moong dal in water for half hour to 1 hour.
In a deep bottom pan, boil water, then add salt, ghee and moong dal. Bring it to boil, simmer and slowly add the rice flour. Using a rolling pin or the ladle, mix the flour with water by stirring it well. When the flour is mixed and done, turn off the heat immediately. Cover with lid and keep aside for 10 to 15 mins.
Once the dough is cool, add chilli powder, sesame seeds, cumin seeds and mix well. Knead till you get a smooth dough. Adjust the salt and spice depending on your preference.
Frying the Chokodi:
Heat a pan with oil, enough to fry 3 -4 at time, if you conscious of not using too much oil. Simmer once it gets hot. The temperature should not be smoking hot.
Grease your fingers with oil and pinch out a small lemon size ball and roll between your palms to form a thick rope. Bring the two ends to together and press to form a rope. Ensure the ends are firmed pressed as not to give out during frying.
Continue with the rest of the dough until you are done with the entire batch. You can either cover it with a plate or a cloth to prevent the dough from getting dried.
Check if the oil is in the correct temperature, by dropping a tiny bit into the oil. Then gently slide the rings or the chakodis in batches of 4 -5. The flame has to be on high until the chakodis come up to the surface, then lower the flame to medium and cook till you get a golden colour on the chakodis.
When the chakodis are golden all over, using a slotted ladle, remove to a kitchen towel and cool. Store in an air tight container for longer shelf life.
Notes: Remember to turn the heat to medium to high and high to medium for getting the chakodis to golden colour and also to be cooked evenly. Only this way you get crispy chakodis. These should not be cooked on low flame as they will absorb more oil and can turn soggy also at times.
Variation: Instead of Cumin and Sesame seeds, 1 tsp of Ajwain or Omam can be used along with chili powder.
Iam happy that I learned a new recipe through this challenge.
Tuesday, December 15, 2009
Subscribe to:
Post Comments (Atom)


22 comments:
Extremely tempting photography.. yummy and crispy murukku.. looks perfect :)
But I missed ICC this time.. :(
yours has come out so well.awesome pictures.
Nice pictures.. looks cute and crunchy.
The ring murruku's look so perfect, love the pictures. like Nithya, even I missed this month's challenge...
Such a gorgeous and crispy murukkus...lovely!
They look awesome. My picture didn't come out well at all. Tasted good though.
i love murukulu. my childhood fav....
Looks absolutely delicious, very beautiful click.
Awesome.. that looks superb.. You have got the frying precise giving it the right golden color. Lovely!
I rushed in today too first thing i got up since it would start snowing by 2 and get dark. Mine did not come out so well. Yours look just perfect.
nice and crispy ring murukus with a wonderful click.
What lovely pictures of such crispies!
Gorgeous clicks... Perfect ,crispy rings.
Perfect murukku and clicks dear.....Tempting cute cute rings.....
looks perfect and great shots!
by far the best looking ones..great job
Never tried ring murukku before. Yours has come out with very uniform size n shape. Thanks for explaining it very clearly, as usual. Will be of great use to all of us.
Hey i love ur space and am so glad i discovered it..i also have an award waiting for you at my blog
Wow...very perfect and look crunchy....love the way u presented...
looks perfect. I never thought of making murukku at home. thanks!
do visit my blog
http://www.inspired-recipes.com/
Beautiful clicks.Murukku came out perfectly
Lovely snapshots! Tha microwave tip was a good one!
Post a Comment