Pages

Monday, December 28, 2009

Weekend Baking - Dates, Prunes and Walnut Bread.


Baked this beautiful bread over the Christmas weekend.
The baking saga started like this. I started browsing through my bookmarked baking recipes on friday morning which continues till sunday evening. There were rolls, buns, cakes, muffins, cookies and what not....I felt like going on a baking spree and start a baking marathon. You might ask me whats the hurry....But this is my last week with the Oven. Yes we are moving to a new house without an oven, and as the move is temperory, we do not want to invest on an oven. Iam going to miss Baking :(.
So I have planned to do as much as baking as possible, atleast try out my most favourite bookmarked recipes, take pictures and save it in my archives for future blogging. Managed to bake some cookies, a cake and this bread by sunday evening, quite satisfied with my work :)
While the cake was ok, this bread turned out great. The original recipe called for just Dates an Nuts. Since I had less quantity of dates, I throwed in some prunes and walnuts.

Recipe source:Joy of Baking
Ingredients:
1/2 cup walnuts
1 cup chopped and pitted dates
1 cup chopped and pitted prunes

1 cup boiling water
1 tsp baking soda

2 cups All purpose flour
1/2 cup light brown sugar
11/2 tsp baking powder
1/4 tsp salt
1/2 tsp cinnomon powder ( I used 1 tsp)
1 tsp  vanilla extract

1/2 cup cold butter
1 egg


Method.
Add the dates and prunes to 1 cup of boiling water, along with baking soda and allow it to cool(atleast 1 hr)
Preheat Oven to 180C. Grease and prepare a bread loaf tin for baking.
Beat the egg and vanilla essence in a seperate bowl
In a seperate bowl add the flour, sugar, cinnamon and baking powder. Mix well to combine.
Add the cold , soft butter to the flour mixture and using a electric beater or food processor, mix, till the mixture resembles coarse bread crumbs.
Add the fruits along with the liquid.Add the chopped walnuts .Mix well to combine

Pour the mixture to the greased bread tin and bake in the preheated oven for 50 - 60 minutes.

Tuesday, December 22, 2009

Hot Cross Buns ..Hot Cross Buns


Hot cross buns, Hot cross buns
One a penny , two a penny
Hot cross buns
If you have no daughters ,
 give them to your sons
One a penny , two a penny
Hot cross buns.

I never knew that such buns really existed until I started blogging.Have been thinking that these were some fancy made up buns for the kids rhymes.Still remember the day when I came across this recipe in a blog , during my early days of blogging, called up my sister and was chatting about it and its history for quite sometime :)
Traditionally these buns are made as a breakfast for the Easter sunday. But for me whether its Easter or Christmas its just the holidays and the holiday spirit that engulfs us matters a lot, hence decided to bake this flavourful bread the past weekend.

 I had picked up couple of cooking books published in the 1980's called the "Hamlyn - The All Colour Cookbook " from the local flea market recently.(These were the only books I could find in english ). It has the recipes for traditionally baked english goodies and 'Hot cross Buns' is one of them.


It may seem like lot of work, but its totally worth the effort.
All the measurements were in oz and pints, I converted them to cups and tblsp for our convenience. Here is the recipe

Ingredients:

12 0z / 3 cups Flour
1 tsp salt
1 tsp cinnomon powder
1/2 tsp of nutmeg powder
1/2 tsp of all spice powder(optional)
1/4 cup sugar
4 tblsp melted butter
1 eff beaten
1 cup raisin/sultanas/currants

For the yeast mixture:

1 tblsp   dried yeast
 1tsp sugar
2/ 3 cup warm milk (11oF)
2/3 cup warm  water less 3 tblsp
1 cup plain flour

Makes 12 medium sized buns

Method:


Step 1:

Take a large bowl.Blend yeast with mixed warm milk , water , sugar and flour.
Leave until frothy, about 20-30 minutes.


Step 2:
In an another bowl sift together remaining flour (3 cups) salt and spices.Add sugar and mix well.
Step 3:
Beat the egg seperatly.  Stir butter, egg and the flour mixture into the yeast mixture.Mix well


Step 4:
Knead the dough on a lightly floured surface for approximately 10 minutes. Make into a smooth ball, cover with a tea towell or a tight lid and allow it to raise for 1 - 11/2 hour or until the dough is double in size.


Step 5:
Punch down the dough with your knuckles gently, take it on a lightly floured surface. Shape it to a log and divide into 12 equal portions. Take each portion and shape it into a ball by using the palm of one hand, first presing down hard and then easing up.


Step 6 :
Place it on a Baking tray lined with parchment paper, spaced well apart. Cover with a towel or greased polythene bag and allow it to rise for another 30 mins.

As you can see from the picture that I didn't shape the balls properly as I didnt follow the rolling into log and cutting equal shapes part.I just pinched the dough approximately like we do for chapati's.
But the earlier method works the best

Step 7:
Preheat the Oven to 180C.  Make a cross witha very sharp knife to just cut surface of dough. Cut with a sharp knife little deeper , for more prominent cross after baking.Bake in the oven for 15 - 20 minutes. Enjoy the aroma that fills your house.


Step 8 :
For the glaze, Bring 2 tablespoon of milk and 2 tablespoon of water to the boil, stir in 2 tblsp of sugar and boil for 2-3 minutes. Brush hot buns twice


Enjoy your weekend breakfast with a cup of tea.
Taste better the next day when all the sugar  and cinnomon seeps in. 


To serve:  Cut the buns into half .Toast slightly with butter and serve warm.

Tuesday, December 15, 2009

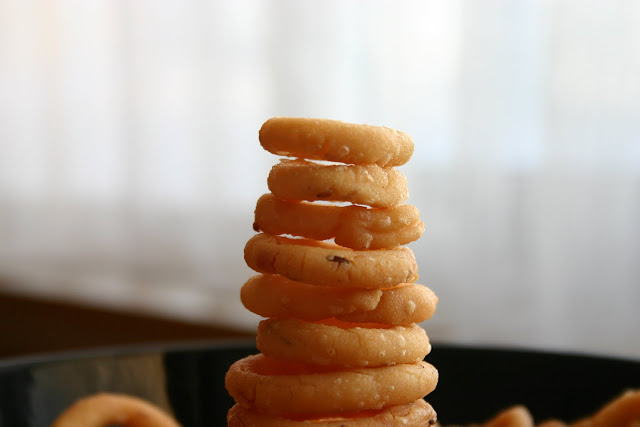
Ring Murukku for ICC.

This was the recipe chosen by Srivalli for this months Indian Cooking Challenge.
As a kid  I loved to eat bagsfull of this snack, never knew the name until now. I was under the perception (dont know how) that this was also made with same murruku press directly in the oil. But when I saw the recipe, was quite glad to see that it was very simple.


The great procastrinator that Iam, didnt try to make it till the last day.Attempting to make things for the challenge was itself a big challenge for me.I followed the recipe 1 to the core, but reduced the red chilli powder to  half(cos of the kid) and ..huh did I mention that I forgot to soak the moongdhal.
Couldnt wait of another half an hour for the soaking, for I wanted to take the pictures in the daylight.The Sun goes off here by 4.00 pm you know.
So I microwaved the dhal for 4 minutes and that did the trick. The Ringis (thats how I want to call them) didnt complain while frying. :)
I used 11/2  cup of rice flour, half of them got over while frying.,Ofcourse it was me, couldnt resist them.


Here goes the recipe as given by Srivalli.


Ingredients Needed:

Rice Flour - 1 cup
Water - 1 cup
Split Yellow Moong dal / Pesara pappu / Mung Dal / Pasiparuppu - 1 1/2 - 2 tblsp
Cumin Seeds - 1 tsp
Sesame Seeds - 1 tsp
Chili powder - 1 tsp
Ghee or oil - 1 tblsp
Salt to taste

Oil for deep frying

Method to prepare:

Making the dough:

Soak moong dal in water for half hour to 1 hour.
In a deep bottom pan, boil water, then add salt, ghee and moong dal. Bring it to boil, simmer and slowly add the rice flour. Using a rolling pin or the ladle, mix the flour with water by stirring it well. When the flour is mixed and done, turn off the heat immediately. Cover with lid and keep aside for 10 to 15 mins.
Once the dough is cool, add chilli powder, sesame seeds, cumin seeds and mix well. Knead till you get a smooth dough. Adjust the salt and spice depending on your preference.


Frying the Chokodi:

Heat a pan with oil, enough to fry 3 -4 at time, if you conscious of not using too much oil. Simmer once it gets hot. The temperature should not be smoking hot.
Grease your fingers with oil and pinch out a small lemon size ball and roll between your palms to form a thick rope. Bring the two ends to together and press to form a rope. Ensure the ends are firmed pressed as not to give out during frying.
Continue with the rest of the dough until you are done with the entire batch. You can either cover it with a plate or a cloth to prevent the dough from getting dried.
Check if the oil is in the correct temperature, by dropping a tiny bit into the oil. Then gently slide the rings or the chakodis in batches of 4 -5. The flame has to be on high until the chakodis come up to the surface, then lower the flame to medium and cook till you get a golden colour on the chakodis.
When the chakodis are golden all over, using a slotted ladle, remove to a kitchen towel and cool. Store in an air tight container for longer shelf life.


Notes: Remember to turn the heat to medium to high and high to medium for getting the chakodis to golden colour and also to be cooked evenly. Only this way you get crispy chakodis. These should not be cooked on low flame as they will absorb more oil and can turn soggy also at times.


Variation: Instead of Cumin and Sesame seeds, 1 tsp of Ajwain or Omam can be used along with chili powder.


Iam happy that I learned a new recipe through this challenge.

Monday, December 14, 2009

Tomato Olive Bruchetta with Mozerella


I regularly stock my pantry with the mini baguettes, that is ready after baking for just 12 mins.Very convenient to make garlic bread  as well as bruchetta's with various toppings.
To make it more rich, I top it with some left over mozerrella cheese (if any).Makes a delicous tea time snack.


Ingredients:

4 mini baguettes or a single loaf of French bread
1/2 cup tomato sauce / Pasta sauce
1/ 2 cup chopped tomatoes.
1/2 cup choped black olives
1/4 cup chopped jalapenos
2 tblsp chopped garlic
4 tblsp olive oil
few tblsp of shredded mozerella

2 tsp dried oregano  or dried basil as per taste.

Method.
Mix the chopped garlic with olive oil and leave it  to rest for about 10 mins
Bake the bread as per instructions
When the bread is cooled, cut into oblong slices
If its mini baquettes cut into half lengthwise.

Brush the bread with the garlic -olive oil mixture.
Spread a tsp of tomato sauce or pasta sauce, and sprinkle with oregano.

Spread the chopped olives , tomatoes, jalapenos as per taste.
Top with shredded mozorella and bake for 15 - 20 mins or until the cheese melts and brown spots appear.

Serve hot.


Some variations
Can avoid the cheese and just bake for 15 mins
Can also avoid the veggies and just bake it as garlic bread.
Can also use different combination of veggies as per taste
 (for ex ., onion + redpeppers+ jalapenos+ basil)

Sending these over to the WYF - Tea Time snack event over at Simple Indian Food an the Sunday Snacks - Cheese event at Mirch Masala

Wednesday, December 09, 2009

Parotta - Southern Stlye from Viki's Kitchen

Have started cooking  a lot from other blogs lately, and am clearing up my bookmarked recipes which is a huge list by the way.
This recipe luckily didnt sit for the usual long time in the folder, for the moment I saw the picture and the method  in Viki's blog I knew I had to try it. Its been my long time wish to try and make these southern style parotta at home, but was not comfortable with the ghee loaded recipes that I found in many pages and also the methods used.


But this one was very simple, with some sesame oil (which we love to use) and the taste was just great.I also liked the quick tip given by Viki about freezing the parottas. I made 12 of them (It took 2 hrs for an amatuer like me) the day before and kept in the freezer.It worked out really well.I used parchment paper used for baking, to line the parottas, instead of Plastic sheets .It was very easy to just slide it out.


The recipe is definitly a keeper and worth all the effort.
Here is the recipe for keepsake:

Source - Viki's Kitchen

Ingredients:
Maida / All purpose flour - 2 1/2 cup
Rice flour - 1 tbsp
water - as per requirement
salt - 1 tsp
baking powder - 1/2 tsp
sesame oil - 1/2 cup

A flat surface like clean kitchen counter top.
Rolling pin.
plastic sheets - 20
Method:
Mix Maida with salt and baking powder.
Then add water little by little to get a chapathi dough consistency.
Then add 3 tbsp oil to the dough and knead well.
Knead for 5 minutes with beating and punching to get a silky smooth dough.
Cover it with a cling wrap or wet towel and leave it for 4 hours in the room temperature.
Then divide the flour in to 10 equal size balls.
In a small bowl, mix the rice flour with 2 tbsp of sesame oil to get a ghee like paste.
Step 1:
Take one dough ball,apply some oil to it and flatten it on a clean kitchen top . Flatten it till it tries to tear off. No need to get a smooth circle.But a very thin disc should be achieved.
(Do not try to take it with hands, just flatten it to a big circle.)
Step 2:
Take a little rice flour + oil mix and apply it smoothly over the flattened disc.
The rice flour gives a flaky texture and also prevents the layers from sticking with one another.
Step 3:
Using a knife , slit the disc into long ribbon like strips. Fold every strip once in a longitudinal manner like a paper.
Step 4:
Apply little oil on a plastic sheet . Make concentric circles using all the folded ribbons to get the shape as shown.
Step 5:
Place another plastic sheet above the dough . No need to apply oil now. Press it gently with a rolling pin to get a perfect circle.


Check out here for the pictorial of the steps given above

Make all the 10 parottas as described in the leisure time. keep them frozen in a freezer. If you want to fry them immediately, then no need to freeze.Heat a dosa tava. Apply a little oil over the surface.Remove the top plastic sheet. Peel off the parotta . Place it on the hot tava.Flip it again and again to get it cooked evenly.
Take out and serve hot.

I served mine with vegetable kurma which is also adapted from chicken salna recipe. Didnt get time to take the picture of this one.


This is another keeper from Viki's Kitchen.The recipe was totally new to me.
However I reduced the amount of redchillies mentioned in the recipe as it was too spicy for me. For 2 cups of Basmati rice I used 5 redchillies.
It turned out perfect for our taste buds.


Ok .. one more final picture...

Thursday, December 03, 2009

Baked Aloo Tikki and a Special Award.


Before going to the recipe I want to mention about this award that I have received from Viki ( EliteFoods) whose blog I love to visit and have also tried some of her amazing recipes.What makes it so special is that, she has created it herself  and am very happy to receive it first hand from her.To be very frank this is my second award from the Blogosphere.Thank you Viki.


I would like to pass this  lovely award to the following ladies
CoolLassie at  PanGravyKadaiCurry
Tina at Kaipunyam
HappyCook at MyKitchenTreasure.

Please pass on this award to as many blogers as you wish.

Now going to the recipe, I made this tikki's (or should I say cutlet) for a small get together.I had planed to make it as a regular tiki using the tawa and made the filling accordingly.I was interrupted by a very important work that day, so ran out of time and decided to take my chance and bake it.It turned out quite great and everyone loved it.


Ingredients:
4 large potatoes.
1 large onion chopped
3 green chillies chopped
1 tsp chopped garlic
1 tsp chopped ginger
1/4 cup chopped coriander leaves.
2 tblsp lemon juice
1 tsp chat masala( optional)
1/4 cup bread crumbs + 1/4 cup for rollling
salt as required

Method


Preheat the oven to 220C
Boil the potaoes.Cool and peel the skin.Mash the potatoes well
Add the rest of the ingredients and mix well
Watch the amout of salt as the breadcrumbs and the chat masala will have salt in it.
Make small balls out of the mixture.
Take 1/4 cup of the bread crumbs in a plate.


Line the baking tray with foil.Grease slightly with oil.
Flatten the potato balls and roll the disc over the crumbs and place it in the prepared baking sheet
 Bake it for 15 - 20 mins approx, or until the crust turns golden


Monday, November 30, 2009

Pav Bhaji with Moong Bean Sprouts


I started making pav bhaji after coming to belgium just because of the beautiful soft buns that we get over here. These buns , lightly toasted with butter and scooped into this gravy is a mouthful of delight and is simply irrestible. Hence this dish started making its way into my kitchen atleast twice a month, especially during those lazy weekend mornings when we get up late and decide to have a brunch. Since I make it quite often I decided to make it healthy and filling by adding sprouted moong dhal. This bhaji was delicious and it completely wipes away the guilt of having white bread and butter.

I soak and sprout the dhal on thursday so its ready for saturday morning.


Ingredients:
1 cup sprouted moong dhal
2 medium potatoes , peeled and cubed
1 medium onion chopped
2 medium tomatoes chopped finely
1 carrots peeled and chopped
1/4 cup of peas
1/4 cup of chopped beans
1/4 cup chopped cauliflower
2tblsp of ginger -garlic paste.
1/4 cup chopped coriander leaves
1/4 tsp garam masala pwd
1 tblsp pav bhaji masala
1 tsp chilli pwd
2 tsp coriander pwd
1 tsp lemon/lime juice
salt and turmeric as required

Method:

Add a Tblsp of oil in a pressure cooker.
Add the chopped onions and fry till translucent.
Now add the ginger-garlic paste and fry well.
To this add the chopped tomatoes, salt , chilli pwd, coriander pwd, pav bhaji masala and fry till oil leaves the sides.
Now add all the vegetables and the sprouts, give a good stir.
Close and pressure cook till 3 whistles.
After it is cooled open the cooker, add chopped coriander, and give it a boil for 2 mins without the lid. Add a tsp of lemon juice and stir well.


Note:
Alternatly you can also pressure cook the vegetables forst and then add to the masala, mix and boil for 10 mins.
The choice and number of vegetables is completly upto the individual taste.
If you dont have pav bhaji masala, substitute it with 1/2 tsp jeera powder+ 1/2 tsp chat masala powder+1/4 tsp of garam masala powder.


Sending this over to Meeta's for the Monthly Mingle where this months theme is "Brunch".

Tuesday, November 17, 2009

My First Chocolate Cake

For an ardent chocolate cake lover like me it took me this long to bake one. I like plain chocolate cake with simple icing , not those which are loaded with layers of cream. So I usually satisfy my craving by settling on the store bought mixes. But this time I decided to give it a go and tried out the recipe from Pusiva's culinary studio. I did'nt like the strong bitter flavour of the cocoa powder that I get here, so used chopped cooking chocolate instead. The cake turned out to be moist and perfect, exactly the way I like it.

We had the cake with some whipped cream, but next time I will make a single layer of chocolate Ganache.


Recipe Adapted from Pusiva's culinary studio.
Ingredients:
1 1/4 cup plain flour
50gms of cooking chocolate.
3/4 tsp baking powder
3/4 tsp baking soda
2 tbsp hot water
1 tsp instant cofee powder or granules
1 cup sugar
2/3 cup butter
2 eggs
1 tsp vanilla essence
3/4 cup water


Method:
Melt the chocolate by double boiling method and allow it to cool.
Mix the coffee poder in the hot water and allow it to cool.
Grease and prepare the cake pan
Seive the flour , baking powder and soda together.(if you are using cocoa powder, include that here)
Beat the buttr and sugar until light and fluffy.Add the egg and beat well for a min.
Now add the cooled chocolate, cofee mixture, vanilla essence , beat for approxately 2 - 3 min.
Add the flour little by little alternatly with water, finally ending with the flour mixture.
Give it a gentle stir by hand until all the flour dissolves. Do not beat while adding the flour.
Pour the mixture on to the prepared pan and bake in an 175C oven for 40 - 45 mins.


Note:
If your cake is browing quickly throw in a sheet of foil over the top of the pan after 20 mins of baking.
I baked the cake twice with and without the coffee powder , it tasted great. So the coffee powder is completly optional.


Having baked my first Chocolate cake I have gained confidence to try out so many different versions of chocolate cake out there with diffrent Icing. So you can expect few more posts on chocolate cakes from me in the future.

Enjoy !!!
Iam sending this Chocolate Cake over to Cook for Yourself event at Food for 7 stages of life.

Wednesday, November 11, 2009

Spicy Chettinad Chicken Fry / Chettinadu Kozhi Varuval


We have had an overdose of chicken lately for the past few weeks which made me try out some special chicken dishes and thus ended up with this wonderful recipe. I learned this one from a TV show in which some famous Chettinad ladies showcased their family recipes. At that time I wondered how few red chillies can bring spiceness to the dish, but I should warn you, It was really really hot and awesome. I generally try to avoid Chettinad dishes because of the grinding of the spices involved( as I dont have a smaller mixer), and also because of the amount of coconut involved( as I try not to use coconut in our diet). But after trying out this recipe I started searching for chettinad recipes for each and every vegetable that I had in my refrigerator and the whole week was like a chettinad fiesta. In this process I also stumbled upon Solai's chettinad kitchen blog, very nice blog for people who love spicy food with some fabulous recipes.
Here is the recipe for Chettinad Chicken Fry:
Ingredients
Chicken - 1/2 kg
For Marination:
red chilli powder - 1/2 tsp
turmeric powder - 1/2 tsp
ginger garlic paste - 1 tsp
lemon juice - 1sp
For frying
red chillies  - 4-5
cinnamon - 1 inch piece
cloves - 2 nos
fennel seeds/sombhu - 1tsp
chopped garlic - 2 tsp
chopped ginger - 1tsp
1 medium onion finely chopped
few curry leaves
salt to taste
Method:
Wash and marinate the chicken pieces with chilli powder , turmeric, ginger garlic paste,salt and lemon juice for atleast 1/2 an hour or overnight.
In wide pan heat few tblsp of oil.
Add cinnamon, cloves, curryleaves, sombhu and redchillies to the hot oil.
Give it a stir for a minute and add the chopped onions, garlic and ginger. Fry till translucent. Now add the marinated chicken pieces, stir well, add 1/2 cup of water and close with a tight lid. Cook in medium flame for 10 mins. Open the lid, stir well , check for salt and cook till the water is absorbed(approx 10 more mins). Garnish with chopped coriander leaves. 


Special Note:-Alternatively you can cook the marinated chicken first by adding them to a pot of boiling water along with cinnamon, cloves for about 6-7 mins.Strain well and reserve the liquid for making soup. Then follow the above process by adding little amount of water. Both method works well.

Some pictures of the Chettinad Chicken Kuzhambhu/Curry and Pepper Rasam that I made on the next day for lunch.

Monday, November 02, 2009

Kodhumai/Wheat Rava/Cracked wheat Uppuma and Coriander-Peanut Chutney

This is a very simple and filling meal which makes its way in to my kichen atleast once a week. Usually I make this uppuma for dinner whenever I make sambhar for lunch, so that I need not put extra effort for making any chutneys.Sambhar and wheat rava uppuma are a classic combo. But yesterday for a change I made this coriander - peanut chutney to go with this delicious uppuma, which equally tasted good.
Change is always good right..

Wheat Rava Uppuma


Ingredients:
Wheat rava/cracked wheat - 2 cups
water - 4 cups
1 tsp mustard seeds
1tsp urad dhal
1 tsp channa dhal
1 tsp chopped ginger
2 green chillies, slit
1 medium onion chopped
few curry leaves
Method
Dry roast the Rava in a pan without oil i medium flame for atleast 10 mins
(Do not avoid this step , as it reduces the raw smell of the wheat a lot)
Heat a tblsp of oil in a non stick pan/kadai.
Add the tempering ingredients mustard, urad dhal, channa dhal and curry leaves when the oil is hot.
When the mustard pops add the onion , chillies and ginger, fry till onion turns translucent
Now add the water and salt to taste.Close with a lid and allow it to boil.
When the water is boiling, slowly add the wheat rava and stir well. Reduce the flame to medium , close with a tight lid and cook for 10 mins.
Stir well, reduce the flame to very low, close with a lid and cook for another 10 mins.
Coriander peanut chutney:


Ingredients:
1 bunch of coriander leaves
1 handful of mint leaves(optional)
1/2 cup of roasted peanuts
2 green chillies
1/2 tsp tamarind paste
1 garlic pod
Method:
Grind all the above ingredients with the required amount of salt
Make the tempering with mustard , urad dhal, curry leaves and pour over the chutney.
Stir well and serve.


Friday, October 23, 2009

Bhoondhi Laddoo - A Diwali Treat


Made these yummy ladoos for Diwali from my mother's recipe. Though there are different forms of ladoos, bhoondhi ladoo has been my favorite, especially I love the ones from Adyar Ananda Bhavan... I didnt have any special laddle for making them, so used the regular slotted laddle (Jalli karandi) a slightly bigger one. The initial rounds of bhoondhi came out just fine but the final three batches got messed up, as they began to clog together. Probably the heat got reduced or the batter became too thin/thick , I am not sure, but who cares I got enough bhoondhi's to make 25 ladoos. I added chopped almonds and raisins instead of the traditional cashews, not that I dont prefer them , I realised that I ran out of cashews at the last minute, but the almonds tasted equally good and balanced out the sweetness of the ladoo.

The recipe is very simple and it hardly took 1 hour for me to finish . Hope you all give it a try.
Ingredients:
2 cups gram flour
a pinch of salt
a pinch of cooking soda
for the syrup :
3 cups of sugar (for each cup of flour 11/2 cup of sugar)
1 cup of water ( for each cup of flour 1/2 cup of water)
few cardomom pods
1 drop of yellow food colour (optional)
1 cup chopped almonds/cashews
1/2 cup raisins
Method:
- Take few tsp of ghee and fry the almonds and raisins as we do for payasams. Keep aside.
- Take enough oil in a wide bottommed vessel(atleast an inch thick)
- Mix the flour soda and salt with enough water , just enough to resemble Idli batter.(The batter should not be either too thick or too thin).
- Once the oil is hot(keeping the slotted laddle over the oil) , spread a laddle full of batter over the slotted laddle in circular motion. The bhoondhi's will fall in the oil.
- Fry them for 2 mins , take them out and drain in a paper towel.The bhoondhi should not become crisp.
- Repeat the same with the remaining batter.
- Switch on the other stove and heat the sugar and water in parallel. Add the smashed cardomom pods to it.
- Allow it to boil and reach the single string consistency i.e., if you touch and release the liquid between your fingers it should form a string.
- At this point switch of the stove and mix the bhoondhi, and fried almonds and raisins.Give it a stir with a wooden spoon, close with a lid and allow to cool for few minutes.
- While its still warm , make it to lemon sized balls.

Note : If the mixture gets cooled after sometime heat for a minute in a a Microwave.
If you do not have a microwave, Sprinkle some warm milk as you make the balls
This recipe makes 25 - 30 medium sized ladoos.

Sending these yummy laddoos to the following events:
Diwali Dhamaka event at Purva's blog
FIL - Ghee Hosted at Sanghi' Food Delights